September 4, 2026
Custom Built Kitchen Island: A Homeowner's Planning Guide

You stand in your kitchen, barefoot on cool tile, looking at the open stretch where the builder left room for something bigger. The room already works, but it doesn't feel finished, and you can probably already see the shape of a long island in your head, with people gathered around it, bags set down on one side, dinner prep happening on the other. That's usually the moment a custom built kitchen island stops being a nice idea and starts feeling like the thing the whole remodel is really about.
In Austin homes, that feeling makes sense. The island has moved far beyond a casual breakfast perch, and recent Houzz data shows how embedded it's become in real renovation work, with 58% of renovating homeowners adding or updating an island during a kitchen remodel, and 42% choosing islands 7 feet or longer in the 2026 Houzz U.S. Kitchen Trends Study (Houzz 2026 Kitchen Trends Report). Houzz also reported that 30% add a new island while 28% upgrade an existing one, which tells you island work is now a standard part of how people rework their kitchens, not a luxury extra.
The bigger shift is how the island functions. It's no longer just a prep counter parked in the middle of the room. It's the homework station, buffet line, snack landing zone, and the spot where everyone ends up standing while dinner finishes. That's why the unglamorous details matter so much, because the island's real success comes down to clearance, code, storage, and how it fits with the cabinetry already in the room.
Table of Contents
- Why the Custom Built Kitchen Island Has Become the Centerpiece
- What a Custom Built Kitchen Island Actually Means
- Sizing Your Custom Built Kitchen Island Around Real Workflow
- Choosing the Right Function for Your Island
- Materials and Finishes That Pair With Your Cabinetry
- Electrical and Code Rules Most Homeowners Miss
- Coordinating Your Island With a Cabinetry Refresh or Full Remodel
- Your Planning Checklist Before You Call a Contractor
Why the Custom Built Kitchen Island Has Become the Centerpiece
A homeowner in Austin often realizes the island matters most at the exact wrong time, when the rest of the kitchen is already under stress. The old table feels too small, the peninsula blocks movement, and the empty floor space starts looking like wasted potential instead of breathing room. In that moment, the island becomes more than a feature, it becomes the part that decides whether the kitchen feels calm or crowded.
The island now carries more than prep duty
The shift away from formal dining rooms, plus the way open-plan homes gather people into one shared space, has pushed the island into a central role. It can serve as a prep zone in the morning, a serving line at dinner, and a casual hangout spot when guests come over. In practical terms, that means it affects circulation, storage, seating, and how the whole room reads from every angle.
Practical rule: If the island feels wrong, the kitchen usually feels wrong. People notice the island first because it sits in the middle of every movement path.
The long view matters here too. Houzz described islands as the “crown jewel” of kitchen renovations in its 2020 Houzz Kitchen Trends Study, when 61% of renovated U.S. kitchens featured an island (Houzz press release). By 2021, Houzz reported 55% of homeowners renovating their kitchens were adding an island or upgrading an existing one, while 63% of renovated kitchens featured an island, and by 2024, the share choosing islands 7 feet or longer had risen to 42%, up 10 percentage points since 2020 (Houzz study recap). That progression shows the island hasn't just stayed popular, it's grown in scale and importance.
For homeowners in places like Round Rock, Leander, Cedar Park, Lakeway, Austin, Buda, West Lake Hills, Bee Cave, Georgetown, Hutto, Pflugerville, Kyle, Dripping Springs, Driftwood, and Steiner Ranch, the pattern is familiar. The room needs to work for real life, not just look finished in photos. That's why the planning spine of a remodel is often the least glamorous part, the part about clearances, outlet placement, and how the island will coordinate with the cabinets already there.
What a Custom Built Kitchen Island Actually Means
A custom built kitchen island is not just a bigger box in the middle of the room. It's built around the room you have, the traffic paths people use, and the cabinet line you're trying to match. This is the difference between a suit made for you and something pulled off the rack. Both can cover the body, but only one is shaped for the person wearing it.
Custom means fit, not just finish
A modular island usually starts with fixed cabinet widths, limited finishes, and a pre-set footprint. A stock island is even more rigid. A custom build, by contrast, can be framed to the exact dimensions of the kitchen, aligned to existing or new cabinetry, and adjusted for unusual heights, deeper storage, or a seat side that feels comfortable instead of forced.
That flexibility matters because kitchens aren't generic rooms. One home may need a pull-out trash center and a clean prep surface. Another may need a built-in seating nook and storage for serving pieces. A custom island can handle those combinations without making the rest of the room feel like it was designed around a catalog page.
A custom island doesn't have to mean rare wood or dramatic stone. It means the island follows the room's workflow, ceiling height, and traffic pattern instead of fighting them.
A good way to think about it is this. A modular island gives you a box you can decorate. A custom island gives you a layout decision. That's why the best projects start with the room's real needs, then work backward into height, depth, finish, and function.
If you're comparing surface choices for the larger kitchen refresh, the material decisions around the island also affect the rest of the room. The same kitchen can feel calm, busy, warm, or formal depending on how the island relates to the perimeter cabinets and counter material. For a deeper material walkthrough, see choosing countertop materials.
The term custom also matters because it keeps people from assuming “one size fits most.” In remodeling, that assumption is expensive. A kitchen island can look simple on paper and still demand unusual framing, careful outlet placement, and a very specific overhang to work in real life.
Sizing Your Custom Built Kitchen Island Around Real Workflow
Treat the kitchen like a stage. The cook is the lead actor, the island is the set piece that gets used in every scene, and guests are the supporting cast who need to move through without bumping into the props. If the set is too tight, the whole performance feels clumsy, even if the finishes are beautiful.
Start with clearance, not countertop fantasy
The first measurement to protect is the walkway around the island. Planning guidance commonly uses 36 in as the minimum walkway, 42 in for a one-cook work aisle, and 48 in for two-cook operation, with 44 in recommended behind seating where people need to pass (kitchen clearance guidance). NKBA-based guidance also calls for 36 inches as the minimum walkway, 42 inches for one cook, and 48 inches for two or more cooks, plus seating overhangs of 12 inches at a 36-inch counter height, 15 inches at a 42-inch bar height, and 18 inches for taller seating setups (NKBA dimensions).
That sounds technical, but it's really about avoiding the daily collision points. Dishwasher doors, oven doors, stool backs, and people walking through the room all need the same space. If the island steals that space, it stops being useful.
Use the room shape to guide the footprint
In a typical Austin single-wall or L-shaped kitchen, an island can often start around 4 by 2.5 feet. Larger galley or U-shaped layouts can stretch to 7 or 8 feet, especially when the room already has enough circulation built in. For a prep-only layout, a common planning threshold is 48 inches by 24 inches, while seating or appliances push the footprint larger, with some design guides noting 60 inches by 36 inches for two seats and 72 inches by 36 inches when a sink or cooktop is included (island sizing guide).
A useful rule is to estimate about 24 inches of counter per stool when seating is part of the plan. That doesn't guarantee comfort by itself, but it keeps people from elbowing each other every time they set down a plate.
Tape the footprint on the floor before you commit. If it feels tight with painter's tape and a couple of stools, it'll feel tighter once cabinets, stone, and appliances are in place.
A 3-foot-deep island often needs a very large room to preserve usable aisles on both sides, so size is never just about the countertop. It's about what the island steals from the room around it. That's why the smartest plan is usually the one that fits the work flow first and the finish second.
Choosing the Right Function for Your Island
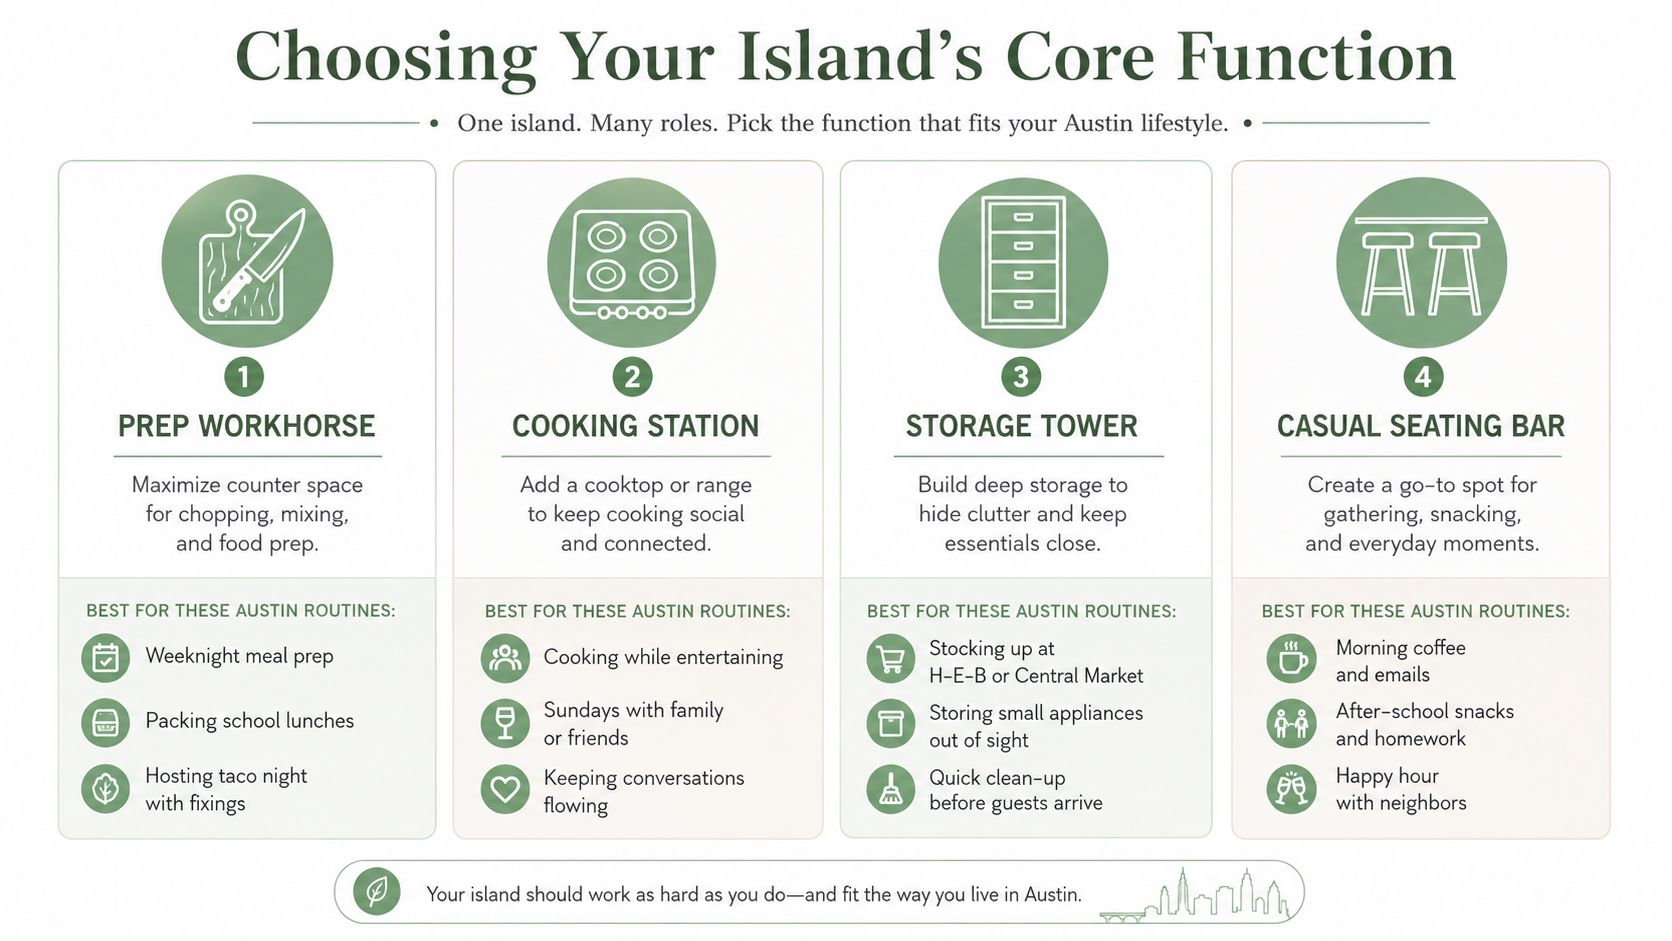
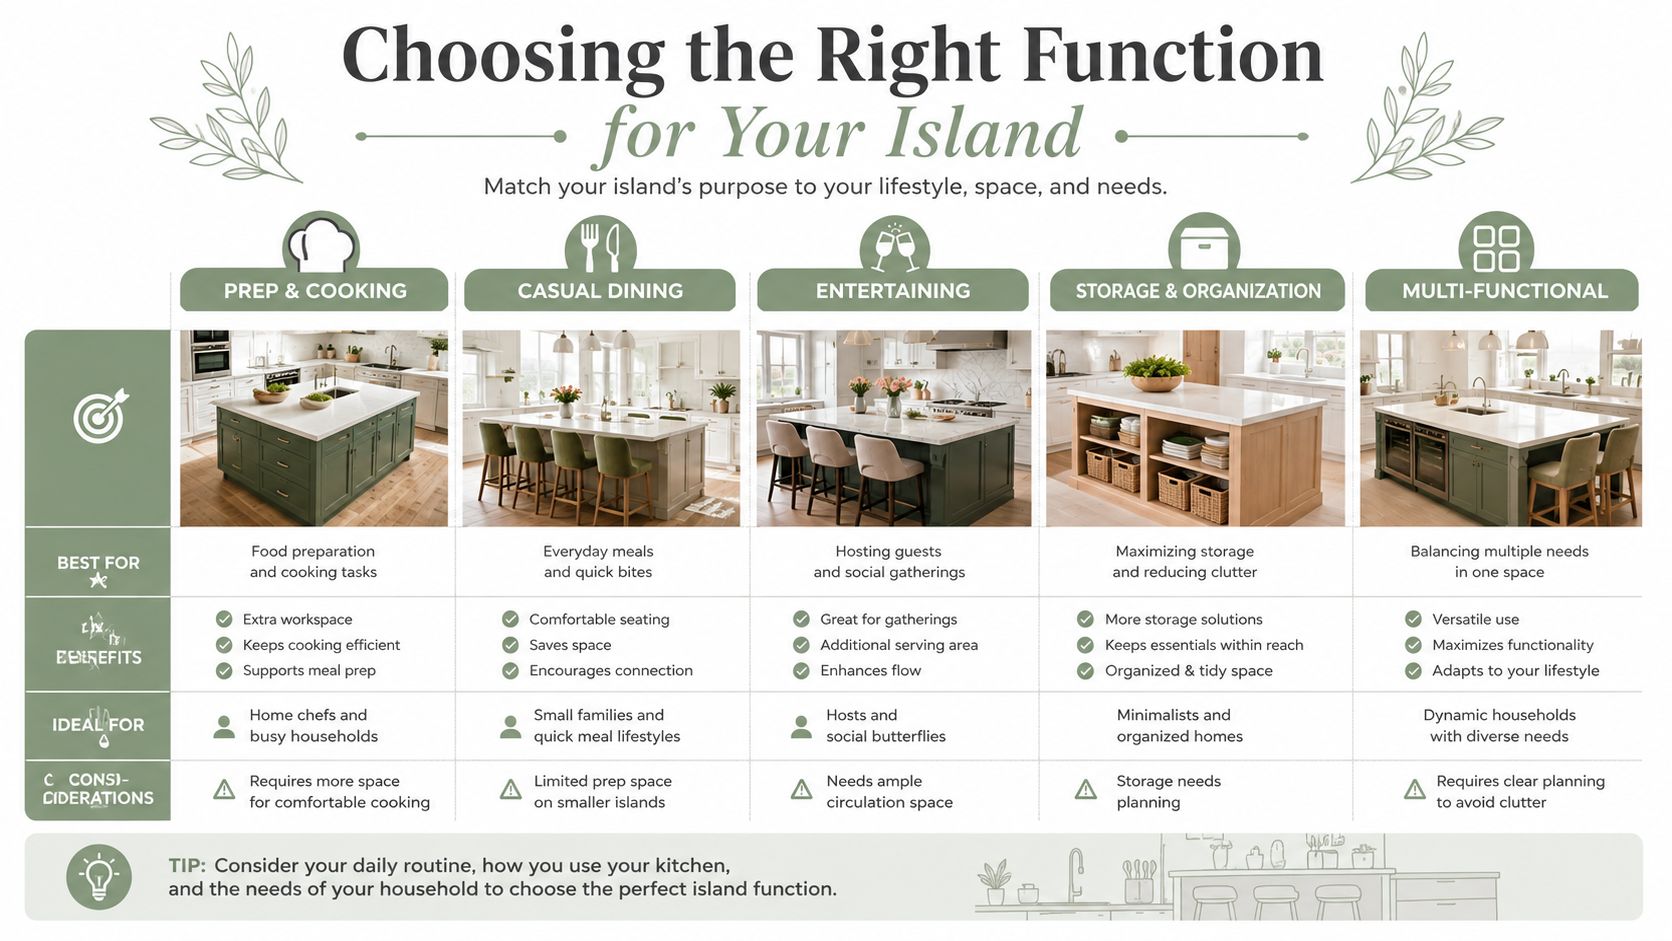
Not every island should try to do everything. Some households need a hard-working prep surface. Others need hidden storage. A few need seating first and function second. The right choice depends on how your kitchen gets used on a random Tuesday, not how it looks on a Saturday afternoon.
Match the island to the way your home runs
A prep workhorse makes sense when you cook often and want an uncluttered surface for chopping, mixing, and setting out ingredients. A cooking station fits a kitchen where the island carries a cooktop or range-adjacent workflow, but that choice adds ventilation and safety planning. A storage tower works when you're short on cabinet space and want drawers, pull-outs, and bulk storage hidden in the middle of the room. A casual seating bar helps when the island is as much about quick breakfasts and homework as it is about cooking.
For a couple who entertains on weekends, a prep surface plus a little seating can be enough. For a family of five packing lunches in the morning, storage and circulation may matter more than a big stool run. A hybrid island can combine two functions, but every added function changes the cabinet depth, the countertop span, and the electrical plan.
Rank your top two needs before you fall in love with a layout
A lot of design mistakes start when people choose seating because it looks inviting, then realize they don't need that many stools. The reverse happens too, when a homeowner wants a huge prep zone but forgets the kitchen has only one real cook and a narrow traffic lane. The island should solve your most repeated problem, not every possible one.
Best decision filter: Write down your top two must-haves, then cut anything that doesn't support them. That simple filter keeps the island from becoming a compromise that does nothing well.
If you're torn between one large multi-zone island and two smaller work surfaces, think about how the room moves during busy hours. A galley-style double island can work in larger spaces, but only when the room has enough width to keep each side functional. In tighter kitchens, one island with clearly separated zones usually performs better than two pieces fighting for the same aisle.
Materials and Finishes That Pair With Your Cabinetry
The island has to live with the rest of the kitchen, not just sit beside it. That means the cabinet finish, countertop material, and trim details all need to make sense together, especially if you're keeping some existing cabinets and refreshing others. The best combinations usually balance durability, maintenance, and visual calm.
Compare finish choices by how you actually live
A paint-grade island box gives you flexibility. It can be matched to perimeter cabinets for a cohesive look, or finished in a contrasting color to help the island anchor the room. Wood species bring more grain and warmth, which can work beautifully in Austin homes that want a softer, more furniture-like feel.
For countertops, quartz is often chosen for its consistent look and easy everyday upkeep, while granite brings natural variation and a stronger stone character. Butcher block adds warmth and can soften a more formal kitchen, but it asks for more maintenance. Solid surface creates a smooth, quiet look that pairs well when the island needs to disappear visually into the room.
| Common Island Cabinetry and Countertop Pairings | Cabinetry Finish | Countertop Material | Durability | Maintenance | Cabinetry Pairing |
|---|---|---|---|---|---|
| Seamless modern look | Painted cabinet box | Quartz | Strong everyday durability | Low to moderate upkeep | Easiest to match to updated perimeter cabinets |
| Warm traditional feel | Wood cabinet finish | Granite | Durable and natural-looking | Moderate upkeep | Works well when other cabinets stay stained |
| Soft, casual look | Painted or wood island | Butcher block | Comfortable and approachable | Higher upkeep | Good for mixed-material kitchens |
| Quiet, integrated appearance | Painted cabinet box | Solid surface | Dependable for daily use | Low upkeep | Easy when the goal is visual continuity |
A contrasting island finish can make the room feel intentional, especially when the perimeter cabinets are lighter or more traditional. A matching finish creates continuity and helps a smaller kitchen feel calmer. If you're planning a broader cabinet refresh, the island becomes one of the easiest places to introduce contrast without making the whole room look chopped up.
Austin humidity swings also make finish quality matter. A cabinet surface that looks great in the showroom but doesn't hold up near a cooktop or sink won't age well in a working kitchen. If your plan includes refinishing existing cabinets, one option is to coordinate the island finish with the rest of the room while keeping the countertop choice flexible for a later update.
Electrical and Code Rules Most Homeowners Miss
The outlet plan can shape the island before a single cabinet gets installed. That's because electrical rules are tied to the countertop dimensions and the way the island is built, not just where the homeowner wants to plug in a mixer. If you ignore that early, the layout can back you into a corner later.
Outlet placement is part of the design, not an add-on
The NEC requires at least one receptacle on each island or peninsula with a countertop measuring 24 in or more in its long dimension and 12 in or more in its short dimension, and kitchen-counter receptacles must be GFCI-protected (NFPA NEC guidance). That means even a clean-looking island may need a hidden side-mounted, pop-up, or below-counter solution, depending on the code that applies where you live.
Recent code interpretation has gotten more nuanced. NAHB noted in 2026 that the updated code removes the old allowance in jurisdictions adopting the unamended 2023 NEC, so receptacles on the sides of islands or peninsulas can no longer satisfy countertop outlet requirements there (NAHB code update). Eaton also states that if an island receptacle is installed, it must be on, above, or in the countertop surface, not below it on the cabinet side (Eaton receptacle guidance).
That rule matters because it changes cabinet framing, overhang depth, and even where seating can fit. A small shift in outlet placement can decide whether a drawer stack works or whether a pull-out trash center has room to breathe.
Code and function affect the inside of the island too
If you add a cooktop or downdraft, the island has to accommodate ventilation paths, clearance, and safe countertop edges. NKBA-based guidance also notes that no work triangle leg should intersect an island or peninsula by more than 12 inches, and when a cooking surface is placed in an island or peninsula, the countertop should extend at least 9 inches behind the appliance at the same height for safety (NKBA safety guidance).
Permit and inspection rules can vary across the Austin metro area, so this is one place where a contractor should verify local requirements before the build starts. That's not red tape, it's part of making sure the island passes inspection the first time and doesn't force a mid-project rebuild.
Coordinating Your Island With a Cabinetry Refresh or Full Remodel
A new island almost never lives alone. It has to match the cabinet work already happening in the room, whether that means refinishing older boxes, replacing door fronts, or changing the countertop line across the whole kitchen. When those pieces are out of sync, the island looks tacked on, even if the craftsmanship is good.
Build the sequence around the finishes you're keeping
If perimeter cabinets are being refinished, that work usually sets the visual baseline for the island. If door fronts are being replaced, the profile and paint tone of those fronts should guide the island cabinet choice. Stone selection comes later, because ordering a countertop before the final cabinet dimensions are locked can force expensive rework.
A good sequence starts with layout, then cabinetry, then surfaces, then lighting. Flooring transitions and appliance panels should be part of the same conversation, because the island needs to look like it belongs to the room from day one. If the island sits slightly off from the cabinet rhythm, the eye catches it immediately.
In a Hyde Park kitchen, that might mean a painted oak refresh on the perimeter and a quartzite island top that gives the room more contrast. In a Westlake new build, flat-panel cabinetry can pair well with a rift-sawn oak island if the goal is a softer, more furniture-like center piece. Those are different visual languages, but both work when the island is planned as part of the full composition.
Coordination rule: The island should never be the first thing you choose if the cabinets and counters around it are still undecided. Let the room's finished baseline guide the island, not the other way around.
For homeowners weighing a broader remodel, kitchen remodel services are often the place where these decisions get tied together by one team. That coordination matters most when the project includes refinishing, new millwork, and updated stone in the same room.
Your Planning Checklist Before You Call a Contractor
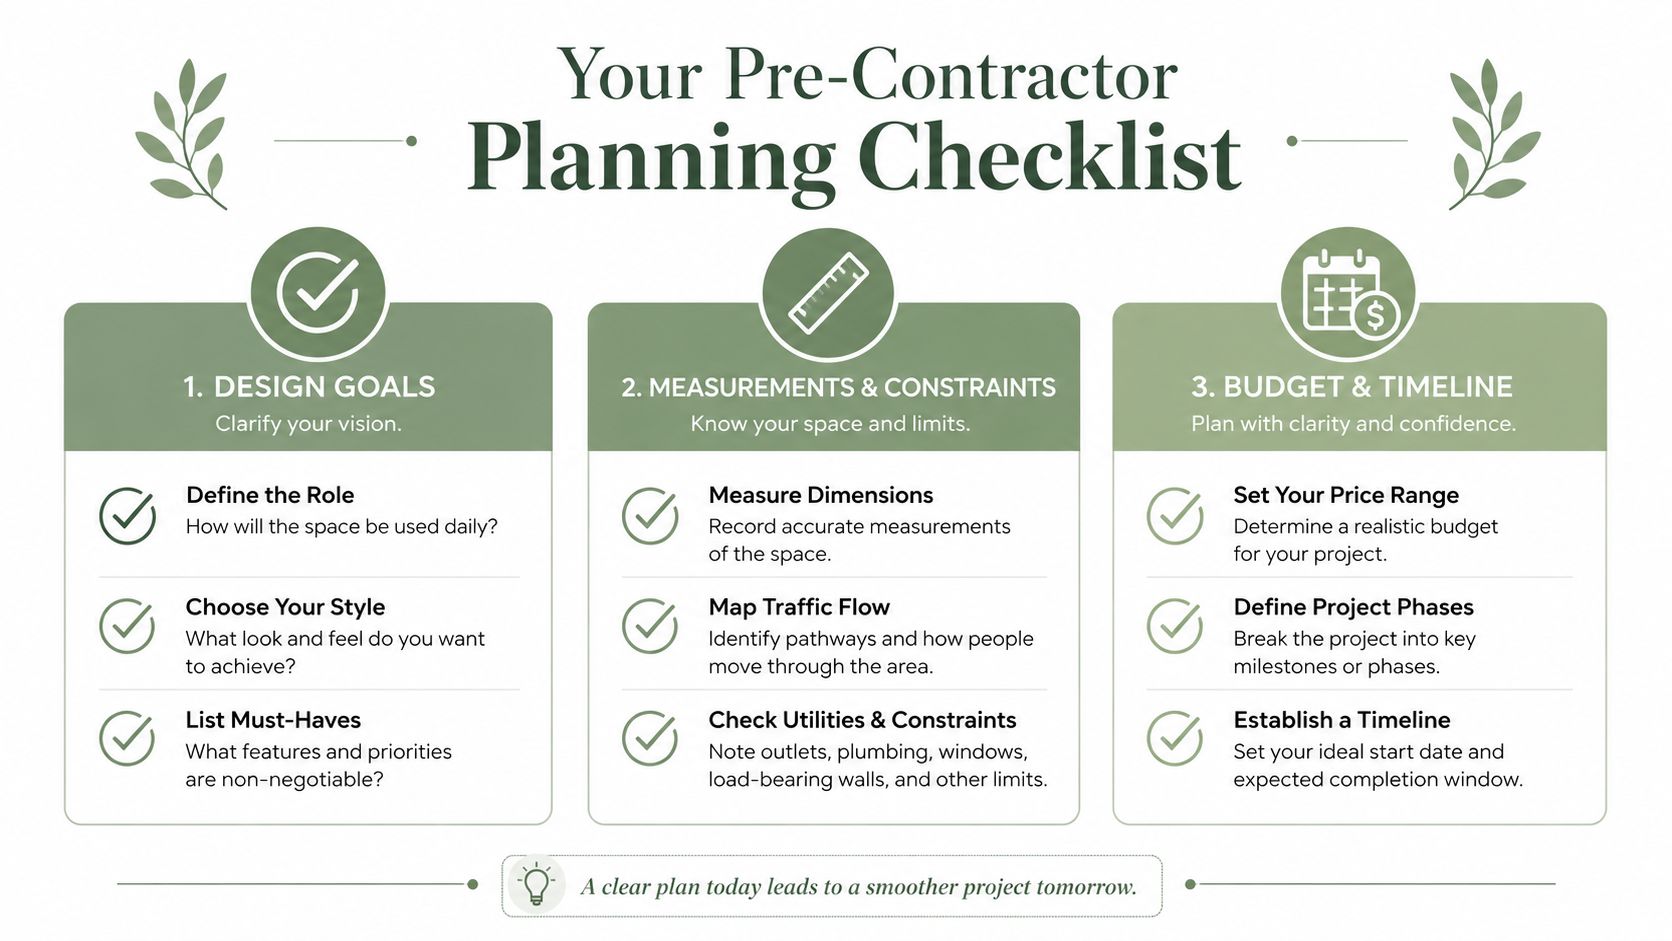
A contractor meeting goes better when you walk in with decisions instead of guesses. You don't need a finished design, but you do need enough clarity to talk through the island as a real part of the kitchen, not a loose idea. The goal is to make the conversation specific.
Bring answers, not just inspiration photos
Start with the room measurements and the clearance targets. Know whether your layout can realistically hold the 36-inch minimum walkway, or whether you need to protect 42 inches or more for daily use. If seating is on the wish list, decide how many stools you need and whether the island has room for the overhang that makes them usable.
Then identify the island's main job. Is it a prep surface, a storage center, a cooking station, or a seating bar? Once you answer that, the cabinet depth, countertop span, and outlet strategy get much easier to discuss.
Use this before the first consult:
- Measurements and clearance: Confirm room width, traffic paths, appliance swing space, and whether the island can keep the walkways open.
- Function priorities: Decide whether prep, storage, seating, or cooking is the lead role, then rank your top two needs.
- Material selections: Note which cabinets stay, which get refinished, and whether the island should match or contrast.
- Electrical and code notes: Ask how receptacles will be placed, how local code affects that placement, and whether the island needs special planning for a cooktop or sink.
- Cabinetry coordination: Write down what's existing, what's new, and what must line up visually.
- Project timing: Confirm what has to happen before the island gets built, including finishes, flooring, and any inspections.
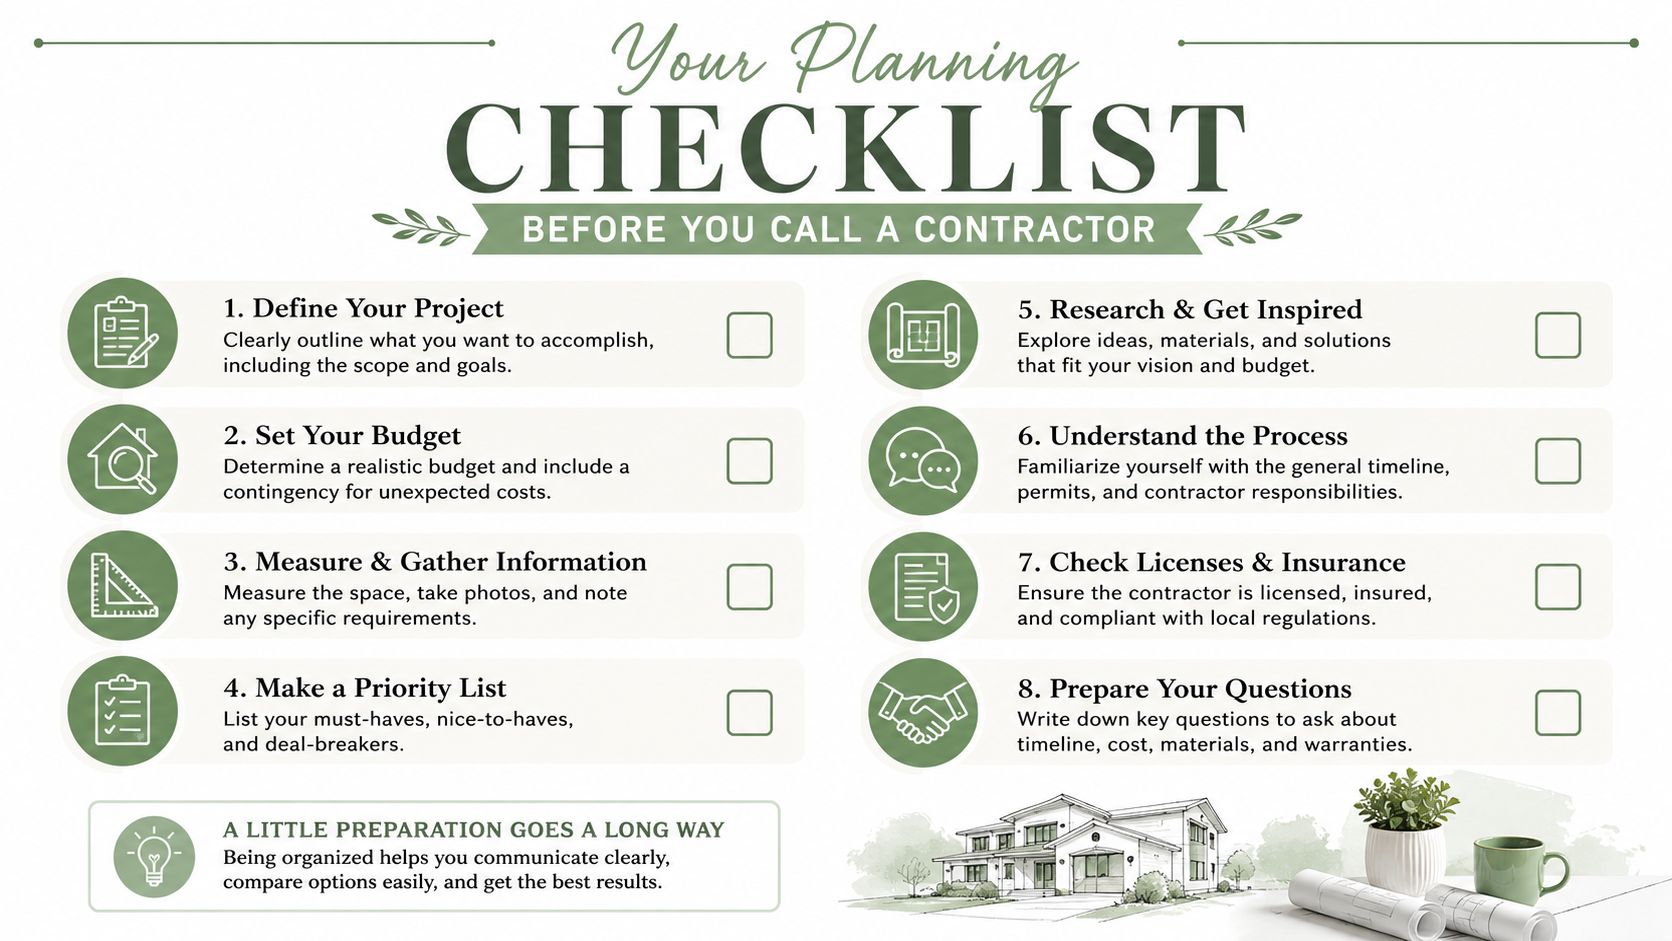
For broader pre-project organization, planning kitchen renovation can help you think through the order of decisions before you commit to a layout. The checklist doesn't replace a contractor's judgment, but it does make the first conversation sharper and more efficient.
A homeowner who shows up with measurements, priorities, and code questions is easier to help. That usually leads to better design choices, fewer surprises, and a smoother remodel from the start.
If you're planning a custom built kitchen island in Austin, Restore My Kitchen ATX can help you coordinate the island with cabinetry finishing, countertop updates, and the rest of the remodel. Visit Restore My Kitchen ATX to start a conversation about a kitchen that fits your room, your routine, and your code requirements.