September 13, 2026
What Is Cabinet Refinishing and How Does the Process Work
Cabinet refinishing is the process of restoring existing kitchen cabinet doors and boxes to a like-new, factory-grade finish through controlled stripping, repair, and spraying, without tearing out the cabinetry. In the U.S., the national average is $3,116, with most projects ranging from $1,992 to $4,495, according to 2026 cabinet refinishing cost data.
You may be standing in your Austin kitchen right now, looking at honey-oak doors from an older build and wondering whether a new color justifies a full demolition. Maybe the layout still works, the drawers open properly, and the boxes are solid, but the finish makes the room feel stuck in another decade. Refinishing gives you a middle path, provided the cabinet structure is worth saving.
The important distinction is that professional refinishing isn't painting over a door. It combines cleaning chemistry, mechanical abrasion, substrate repair, primer selection, spray technique, and controlled curing. In Central Texas, where sunlight, cooking humidity, and seasonal temperature swings test every coating, those details determine whether your new finish stays smooth or starts failing early.
Table of Contents
- Why Your Old Cabinets Might Not Need Replacing
- What Cabinet Refinishing Actually Means
- The Refinishing Process From Strip to Final Coat
- Refinishing vs Painting vs Refacing vs Replacement
- How Long a Real Refinishing Project Takes
- Results You Can Expect and How Long They Last
- Common Misconceptions About Cabinet Refinishing
- Choosing a Refinishing Pro in the Austin Area
Why Your Old Cabinets Might Not Need Replacing
In a Pflugerville kitchen, sturdy maple or oak boxes can look far worse than they are. The golden finish may feel dated, the areas around the pulls may be worn, and a South Texas remodel can seem to require a full tear-out. Start with the cabinet structure, not the color. If the layout still works and the boxes remain rigid, refinishing may solve the visible problem while preserving useful cabinetry.
Open and close each door. Check whether it sits squarely, listen for loose hinges, and inspect drawer fronts near the dishwasher. Under the sink, look for swelling, dark stains, soft material, or signs of an old leak. A failing coating is usually a surface problem. Cabinet material that has absorbed water and lost its shape may require component repair or replacement.
Separate cosmetic wear from structural damage
South-facing windows can fade or yellow exposed finishes, while cooking steam and Austin humidity gradually stress the factory coating. Fingerprints and cooking oils collect around pulls, doors, and the cabinet above the range. On porous wood, that residue can become embedded in the surface. New coating will not bond reliably until the contamination is removed, which is why professional preparation depends on cleaning chemistry as much as sanding.
A useful inspection checks four areas:
- Hinge integrity: Doors should sit squarely, with hinges attached firmly to sound material.
- Box condition: Frames and sides should not show major separation, sagging, or movement.
- Drawer-face health: Swelling beside a dishwasher can indicate moisture damage rather than ordinary wear.
- Sink-base condition: Soft MDF, peeling veneer, or persistent staining may exceed what refinishing can correct.
Practical rule: If the layout works and the boxes remain rigid, investigate restoration before assuming replacement is necessary.
Furniture-grade plywood boxes can often support several finish cycles. The cabinet skeleton may therefore have years of useful life left even when the color feels trapped in another decade. Refinishing keeps that structure in place and reduces the dust, material removal, and household disruption of a tear-out.
Project scope still affects the decision. In Round Rock, Cedar Park, and Lakeway, labor access, the number of doors and drawer fronts, intricate profiles, repairs, and the condition of the existing coating can push a job toward the higher end of its expected range. A large kitchen with many removable parts requires more labeling, spraying, drying space, and reinstallation time than a compact run with simple slab doors. That is why a sound cabinet can be a better candidate for restoration even when its finish looks beyond saving.
What Cabinet Refinishing Actually Means
Cabinet refinishing restores the cabinet surfaces already in your kitchen. A professional crew removes the doors and hardware, evaluates the existing coating, cleans away grease and wax, repairs dents and chips, then abrades or strips the surface as needed. The crew applies a compatible primer and sprays a new topcoat under controlled conditions. The boxes remain in place, carefully masked and finished as part of the same coating system.
The chemistry matters as much as the color. Industry guidance on cabinet refinishing standards connects degreasing, sanding, dust removal, coating compatibility, and curing conditions. A greasy or polished surface can keep primer from wetting and bonding correctly. Abrasion creates a microscopic texture, much like tiny footholds, so the primer can grip instead of sitting on a slick surface. In an Austin kitchen, that preparation also has to account for cooking residue, humidity, and temperature changes that can expose weak adhesion over time.
A refinishing project can change the color, sheen, and feel of sound cabinetry while keeping its existing layout. The result depends on the complete system, not paint alone: surface condition, cleaning chemistry, primer, topcoat, spray technique, and cure time all affect how the finish performs.
Painting and refinishing are often used as if they mean the same thing, but refinishing describes the larger restoration process. It may include paint, yet it also covers decisions about the old coating, repairs, adhesion, and controlled application. The dedicated comparison later separates refinishing from painting, restaining, refacing, and replacement.
For example, a crew may recommend a different coating approach for stained oak than for previously painted maple. The visible color is only the final layer. Underneath it, each step must support the next one, like building a finish from a clean, stable foundation.
The Refinishing Process From Strip to Final Coat
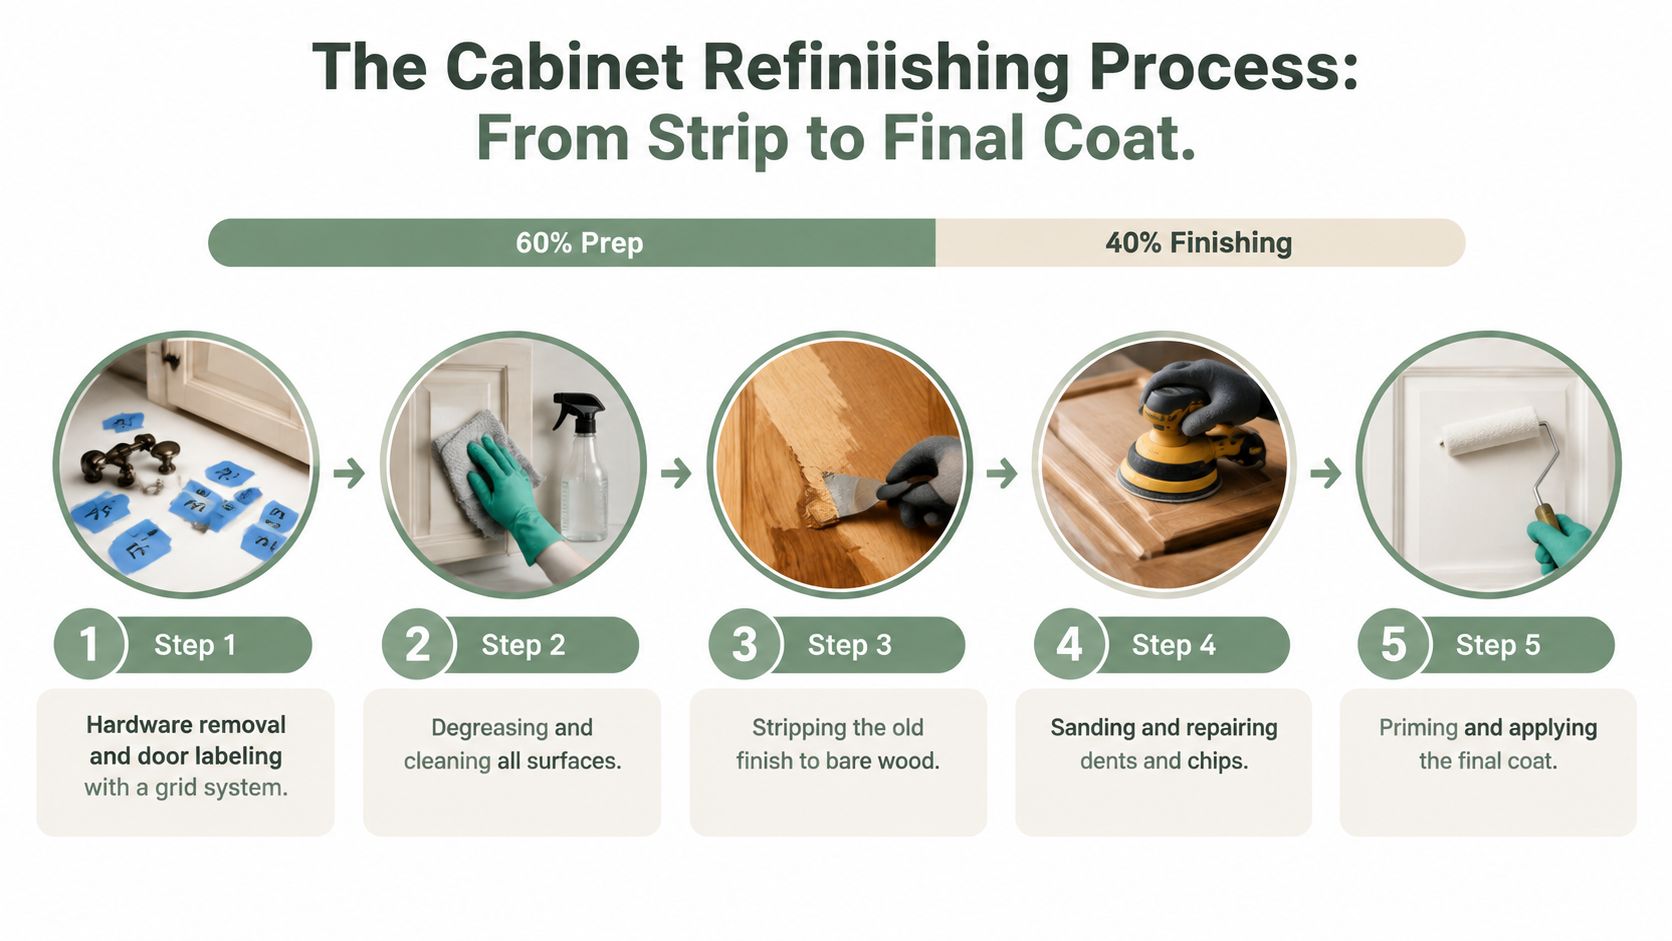
In an Austin kitchen, a durable finish begins long before the sprayer is turned on. A professional workflow starts by removing doors and hardware, labeling each piece, degreasing all surfaces, sanding or stripping the existing coating, repairing defects, priming, and applying the topcoat. Doors are usually finished in a controlled area, while cabinet boxes are masked and coated in place. This sequence is the practical backbone of a professional cabinet refinishing workflow.
The sequence that prevents early failure
Label every part first. Mark doors and drawer fronts on a cabinet map that remains readable through removal, sanding, spraying, and reinstallation. Without those labels, doors can return to the wrong openings, leaving uneven gaps and creating extra hinge adjustments.
Remove kitchen contamination next. Degreaser breaks down cooking oil, wax, and residue that an ordinary household cleaner may leave behind. Pulls, edges, and areas near the range collect buildup quickly. If that film remains, the new coating may peel even though the color looks flawless on installation day.
Choose the removal method based on the old finish. A stable coating may need only scuff-sanding to create a mechanical grip. A failing or incompatible coating may need chemical stripping until the surface reaches bare wood or another stable substrate. Use mid-to-fine grits such as 150, 180, and 220 to create a consistent bonding profile, following this cabinet surface preparation guidance.
Repair dents, chips, and open grain before primer. A finisher may apply catalyzed wood filler, sand it flush, and inspect the surface under strong light. Small defects that seem harmless on raw wood can become obvious beneath a smooth, reflective topcoat.
Primer and spray application
The primer must match the substrate. A bonding primer helps previously finished wood accept the new coating system. A tannin-blocking primer helps limit discoloration from woods such as oak, maple, or cherry. Apply it as a controlled film. A heavy brush layer can obscure profiles and dry unevenly.
Cabinet systems may include waterborne acrylic-alkyd hybrids, one- and two-component polyurethane coatings, or catalyzed lacquers. Two-component polyurethane offers higher abrasion and chemical resistance, while catalyzed finishes cross-link during curing and form a harder film than ordinary air-dry paint, according to cabinet finish durability guidance.
The final work includes controlled spraying, flash time between coats, cure time, hardware installation, and adjustment of hinges and drawer reveals. A surface that feels dry is not necessarily cured. Give the coating time to harden before normal kitchen use, especially in an Austin home where heat, humidity, and cooking activity can test weak adhesion.
Refinishing vs Painting vs Refacing vs Replacement
A kitchen in West Lake Hills may need only a new finish, while a Buda family may need more storage, a larger island, or a different work triangle. Start by checking the cabinet boxes and layout, then choose the surface treatment that fits the room.
| Method | Typical Cost | Project Length | Expected Lifespan | Best Fit |
|---|---|---|---|---|
| Refinishing | National average $3,116, with most projects at $1,992 to $4,495 in the U.S. (cost data) | Often 3 to 5 days for a small or medium kitchen | About 10 to 15 years when preparation and the coating system are appropriate | Sound cabinets with a dated, worn, or damaged finish |
| Painting | Typically $2,500 to $5,500, depending on prep depth and coating system | Usually shorter than replacement, but depends on scope | Depends on primer, coating, preparation, and cure conditions | Stable cabinets needing a color change |
| Refacing | Roughly $4,300 to $10,000 in industry pricing summaries | More involved than refinishing because new visible components are installed | Depends on the new doors, veneer, and installation quality | Sound boxes with unwanted door styles or damaged faces |
| Replacement | Typically the most disruptive option | Often longer because demolition, fabrication, and installation are involved | New-cabinet quality varies by materials and installation | Layout changes, severe damage, or major storage redesign |
Refinishing usually offers the strongest value when the layout works and the boxes remain stable. It changes the existing surface, not the cabinet's underlying structure. Refacing replaces doors, drawer fronts, and visible coverings, so it changes the cabinet's appearance more substantially, but it does not automatically repair problems inside the boxes.
Replacement makes sense when the room needs a different footprint, storage plan, or cabinet configuration. It also creates more demolition, fabrication, and installation work. In an Austin kitchen, the better finish is not the thickest or glossiest one. The result depends on how well the coating bonds, how evenly it is applied, and whether the system suits heat, humidity, cooking grease, and daily abrasion.
Brush-on work can suit limited projects, though it may show more texture than a controlled spray finish. Homeowners comparing application methods can review cabinet painting services, then ask each contractor which cleaning, sanding, primer, topcoat, and curing steps the quote includes. Those details often explain why two estimates for the same kitchen differ.
How Long a Real Refinishing Project Takes
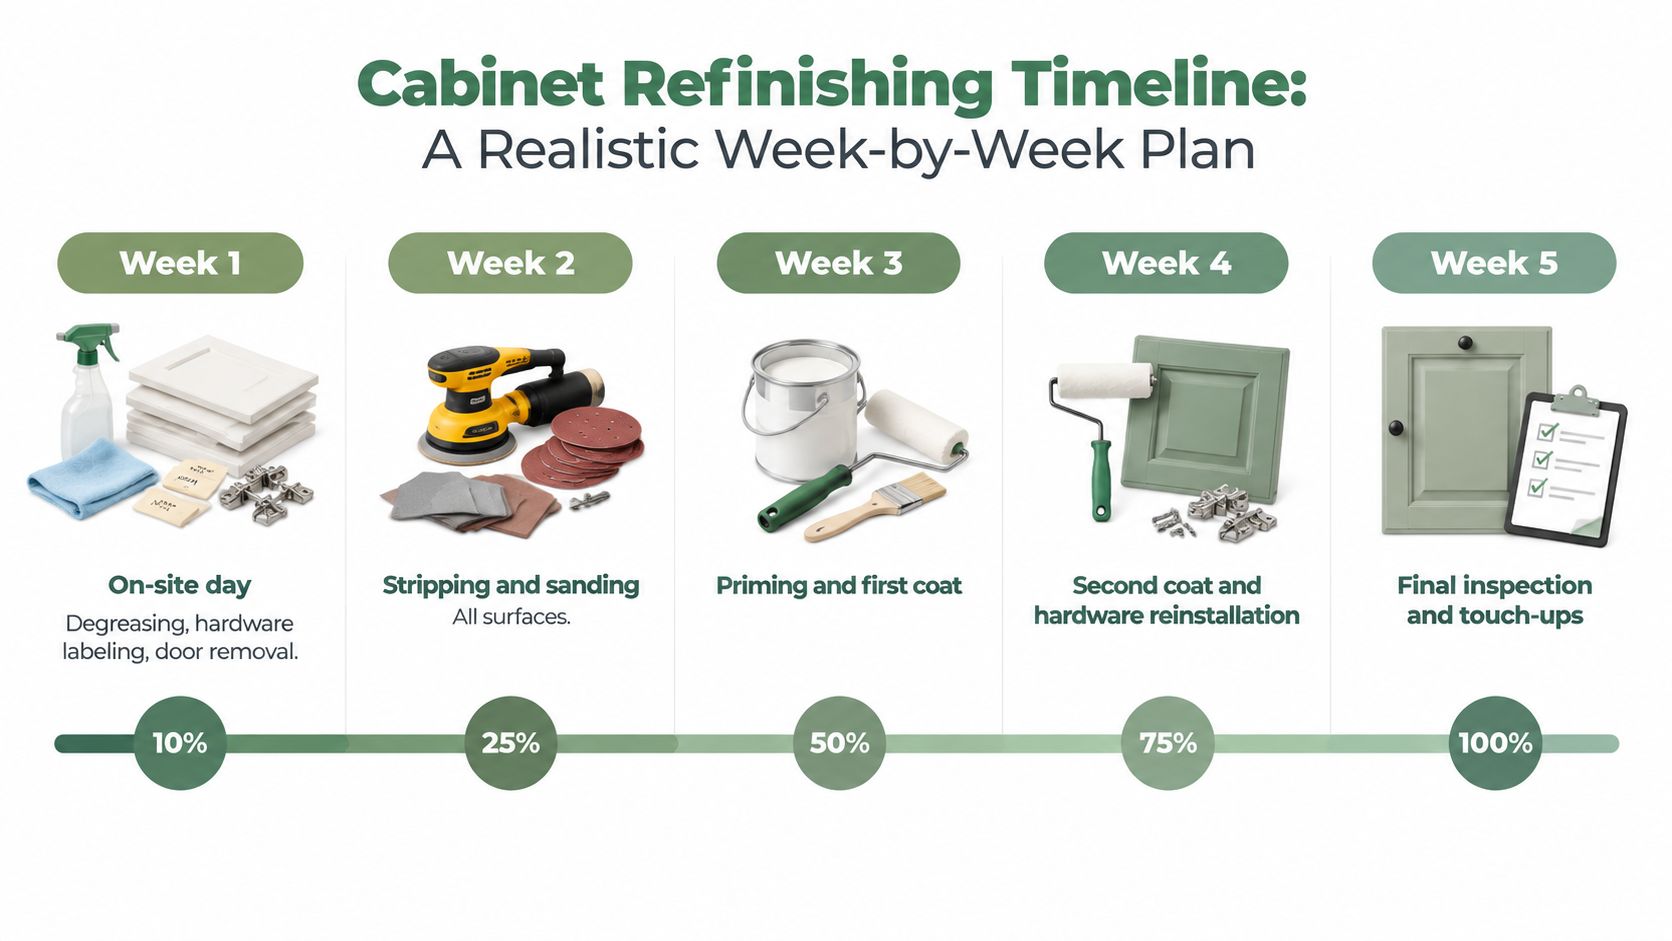
In an Austin kitchen, a small refinishing job may take 3 to 5 days, but that calendar includes more than spraying. Active labor and safe curing are different parts of the schedule. A broader project timeline places the work at about one week, covering removal, preparation, spraying, curing, reinstallation, and the final walkthrough, as outlined in cabinet service timeline guidance.
The first visit usually involves degreasing, labeling doors and hardware, masking the room, and removing the doors and drawer fronts. Those parts may go to a shop or controlled spray area. There, the crew strips or abrades the old coating, repairs defects, applies a compatible primer, sands between stages, sprays the topcoats, and waits for the film to cure before returning it to the home.
What can stretch the schedule
Austin-area timing changes when inspection reveals more substrate damage. A worn door may need filler, edge repair, veneer stabilization, or extra sanding before it can accept an even coating. Waterborne products may also cure more slowly during humid summer weather if temperature and airflow are poorly controlled.
A useful analogy is drying concrete. The surface may feel ready before the material underneath has gained enough strength. Cabinet coatings also need time to harden, so a door that looks finished may still be vulnerable to sticking, fingerprints, or impact.
The kitchen can remain partly usable while the doors are away, though daily routines will change. Ask whether the estimate includes box repairs, hardware reinstallation, and final adjustments. Those items should not be assumed.
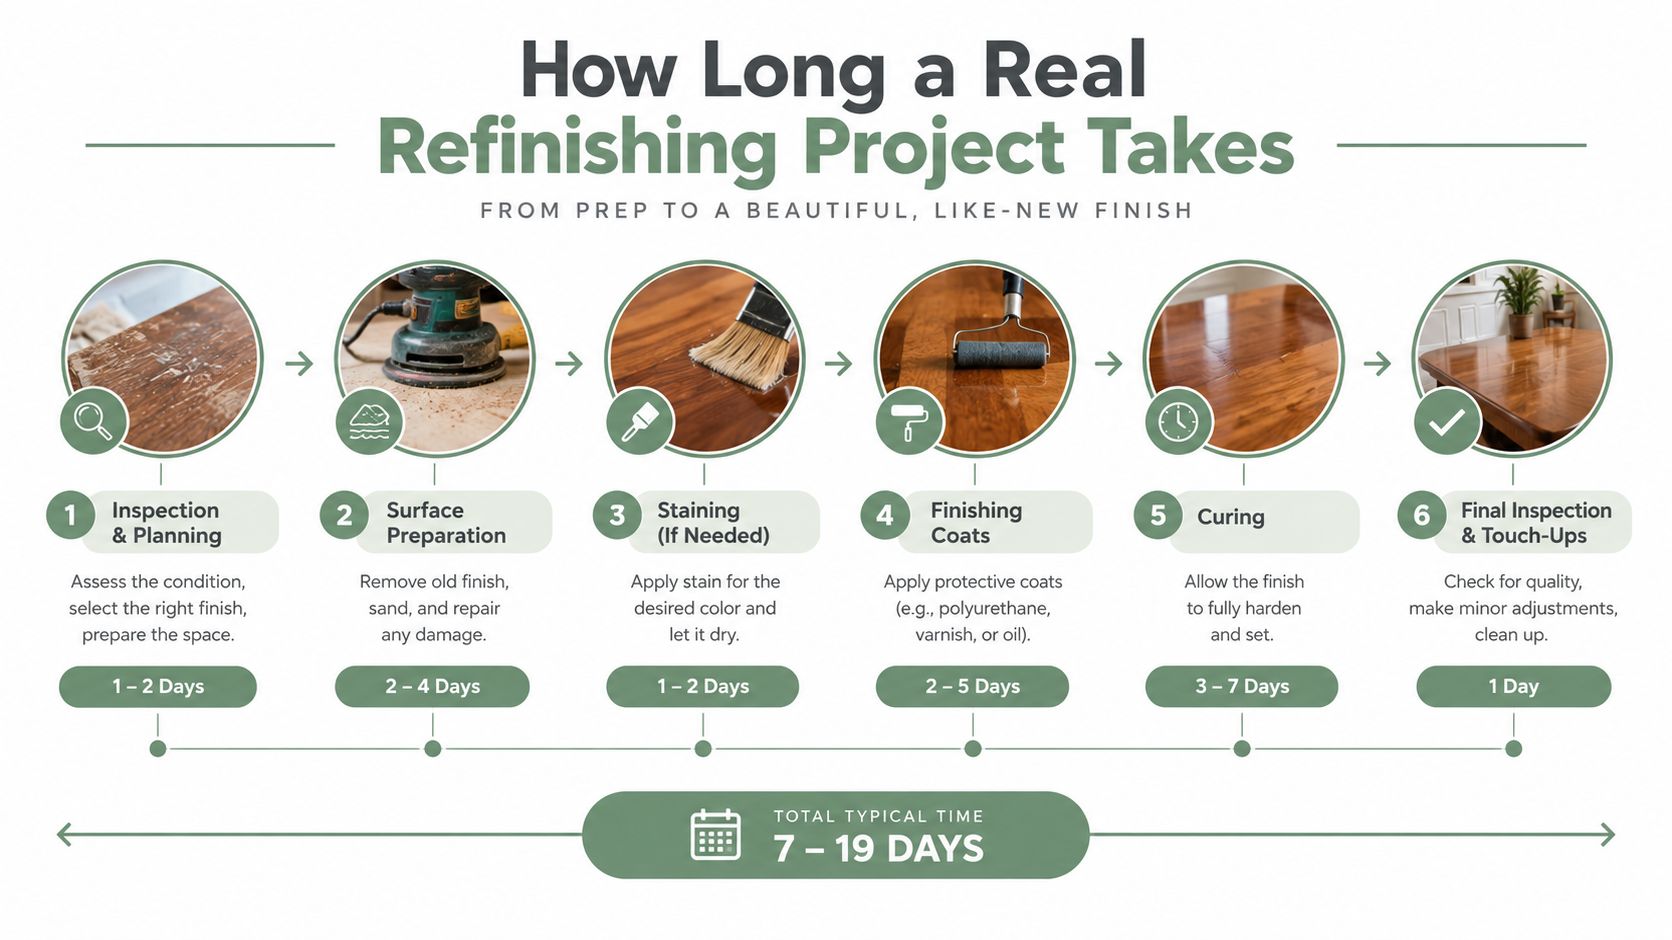
A realistic schedule is more useful than a rapid-turnaround promise. The coating chemistry, prep sequence, and Texas humidity all affect the final cure. If a contractor skips cure-time details, ask how the finish will be protected before the doors return to daily use.
Results You Can Expect and How Long They Last
A well-sprayed cabinet finish should feel even beneath your hand, with a consistent sheen across doors, drawer fronts, and frames. Controlled spraying limits brush marks, lap lines, and roller stipple. Catalyzed conversion varnish and catalyzed polyurethane can form the harder, factory-like film many homeowners expect from professional work.
The appearance is only the visible part of the result. Durability depends on the complete coating system: a clean substrate, the right surface profile for adhesion, a primer suited to the wood, and a topcoat that cures under controlled conditions. A premium product cannot compensate for grease, loose material, or a failing old finish.
Austin conditions still matter
Cabinet doors near south-facing windows receive strong heat and light. Kitchens in Cedar Park, Bee Cave, and Dripping Springs may also shift between humid cooking zones, air-conditioned rooms, and drier Hill Country air. Refinishing remains suitable, but those conditions make product choice, film thickness, ventilation, and cure control important.
The 10 to 15 year range discussed above is a useful planning reference, not a promise for every kitchen. Daily handling, standing water, harsh cleaners, impact, and the cabinet material all influence the outcome.
In Austin kitchens, the first visible failure often appears where water is easiest to ignore. Sink-base doors and nearby edges may swell or soften after repeated splashes, while south-facing doors may show color change or yellowing sooner from light and heat. These are different problems. Edge swelling points to moisture reaching the substrate; fading or yellowing involves the coating and its exposure.
Maintenance helps limit both. Use a soft cloth and a mild cleaner approved for the coating system. Avoid abrasive powders, strong solvents, soaked edges, and water left around sinks or dishwashers. Review these ways to protect cabinet finishes in Texas humidity when setting a cleaning routine.
The practical expectation is a major visual change that responds well to ordinary care. Refinishing will not rebuild a damaged cabinet box or prevent every dent, but it can restore a consistent surface while keeping a functional Austin kitchen's layout.
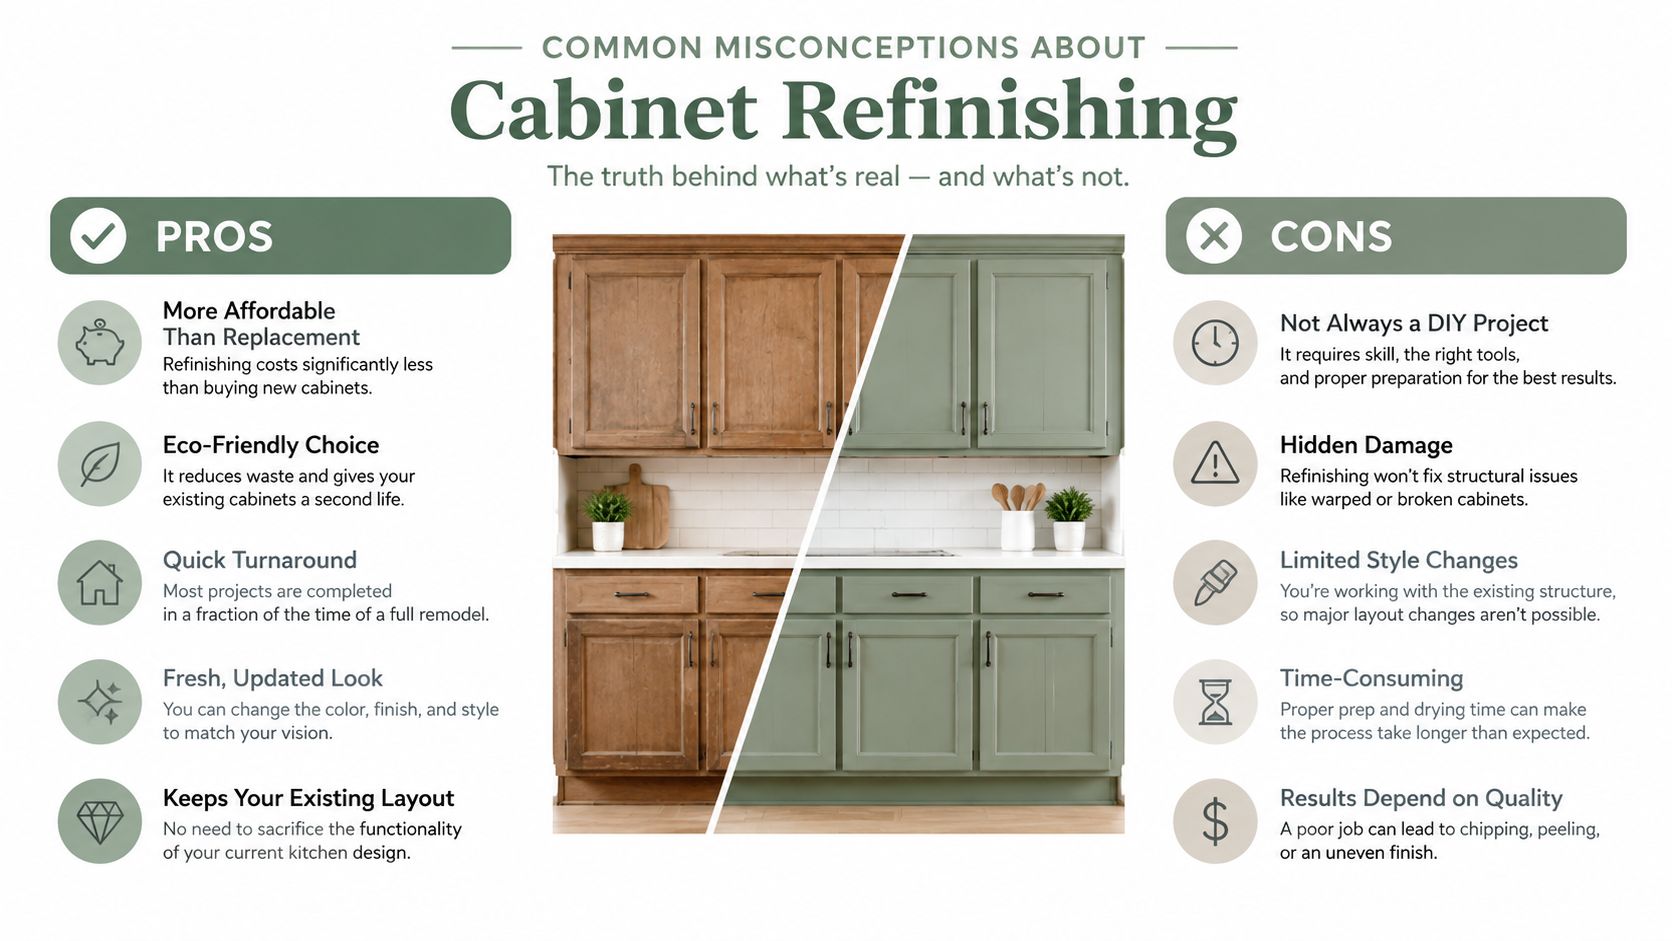
Common Misconceptions About Cabinet Refinishing
“It's just painting.” Not in a professional shop. Refinishing may involve stripping, degreasing, scuff-sanding, grain filling, bonding primer, tannin control, spray application, and controlled curing. The topcoat is only one part of the system.
“It will peel within a year.” Peeling usually points to a process problem, such as grease left on the surface, inadequate abrasion, an incompatible primer, or poor cure conditions. The cabinet refinishing standards guide explains why preparation chemistry and mechanical profile affect adhesion more than color selection.
“A strong smell means poor quality.” Some professional coatings have noticeable odors during application and curing. Odor alone doesn't identify quality, but a contractor should explain ventilation, product handling, household access, and when the room is suitable for normal use.
Color and sheen myths
“Dark cabinets can't become white.” They can, but dark stains and porous woods may require careful cleaning, sanding, filling, and a primer designed to block bleed-through. Skipping those steps can leave yellow, brown, or uneven areas beneath a light color.
“High gloss always looks plastic.” Gloss reflects more light and exposes surface defects, but a carefully applied high-sheen system can look refined rather than artificial. The final appearance depends on film uniformity, door condition, color, and the surrounding lighting.
“DIY kits match professional results.” A homeowner can achieve a useful refresh with patience and the right materials, but professional spraying requires equipment, filtration, controlled film build, and a suitable curing environment. Brush and roller application can leave texture that becomes obvious beside factory-finished appliances and millwork.
Refinishing isn't the right answer for every kitchen. Delaminated veneer, water-damaged MDF, severely warped doors, and unstable boxes may require component replacement, refacing, or new cabinetry. An honest contractor should identify those limits before discussing color.
Choosing a Refinishing Pro in the Austin Area
A good contractor should be able to explain the sequence without hiding behind a color catalog. Whether you live in Georgetown, Hutto, Lakeway, Kyle, Driftwood, Steiner Ranch, or central Austin, ask questions that reveal how the work is performed.
Questions worth asking before signing
- Where are the doors sprayed? Off-site spraying in a filtered booth or a properly enclosed work area usually offers better control than brushing in the kitchen.
- Which primer and topcoat are specified? Ask why the system suits your cabinet material, especially with birch, oak, maple, or knotty alder.
- How is the surface prepared? The answer should include degreasing, abrasion or stripping, dust removal, repairs, and a primer suited to the existing finish.
- How long will the coating cure? A professional should explain when doors can be handled, reinstalled, and exposed to normal kitchen use.
- What does the warranty cover? Look for clear language covering peeling, yellowing, adhesion failure, and moisture-related response, not only workmanship in general.
References should come from the same market and similar homes. Search neighborhood conversations on Nextdoor and Houzz, then read Google reviews for mentions of repairs, masking, communication, reinstallation, and finish consistency rather than only comments about a new color. Ask to see doors or frames in person if the contractor can provide an appropriate reference.
Read the estimate line by line. It should identify hardware removal and reinstallation, hinge upgrades if requested, minor box repairs, door labeling, spray location, primer, topcoat, cleanup, and final adjustment. A low initial number can change quickly when those items appear as add-ons.
Restore My Kitchen ATX is one Austin-area option offering cabinet refinishing, cabinet painting, restaining, and broader kitchen services, with project-specific scoping described on its kitchen restoration services page. Compare that scope with other qualified local contractors and choose the proposal that makes the process, materials, timeline, and limitations easiest to understand.
Restore My Kitchen ATX offers cabinet refinishing for existing doors and boxes, including stripping, repairs, and spray application for a factory-grade surface without a full cabinet tear-out. If your Austin-area kitchen in Round Rock, Leander, Cedar Park, or beyond has solid cabinetry but a failing finish, visit Restore My Kitchen ATX to discuss the condition of your cabinets and request a project-specific consultation.