September 17, 2026
Varnish for Kitchen Cabinets How to Choose and Apply

You wipe the cabinet doors after dinner, but the area near the dishwasher still feels dull. Steam reaches the lower doors, cooking grease settles around the pulls, and bright Austin sunlight falls across every small scratch. In Round Rock, Leander, Cedar Park, or any nearby Central Texas community, a kitchen finish has to handle more than occasional spills.
That's why varnish for kitchen cabinets still deserves careful attention. A clear finish can protect stained or natural wood while preserving the grain, but the resin type, sheen, film thickness, preparation, and curing conditions all affect the result. Varnish isn't magic, and it won't repair swollen wood, hide poor sanding, or make an unsuitable cabinet substrate stable.
The practical question is whether varnish fits your kitchen better than paint, lacquer, oil, or another clear system. You'll also want to know whether a low-sheen finish can look current without becoming difficult to clean, how humidity affects application, and when refinishing makes more sense than replacement.
Table of Contents
- Introduction Why Varnish Still Matters in Modern Kitchens
- Understanding What Varnish Is and How It Protects Cabinets
- Comparing Varnish Types for Kitchen Cabinets
- How Varnish Performs Against Moisture Heat and Sunlight
- Application Best Practices That Create a Factory Grade Finish
- Where Varnish Fits in Cabinet Refinishing and Remodel Workflows
- Choosing the Right Varnish and Next Steps for Your Kitchen
Introduction Why Varnish Still Matters in Modern Kitchens
A homeowner in Lakeway may love the warm look of stained oak until the cabinet beside the range starts showing a cloudy patch. A family in Bee Cave may choose natural wood for its texture, then discover that fingerprints, steam, and repeated wiping make the wrong sheen look tired. In Pflugerville, a sunny kitchen can expose uneven fading that wasn't visible when the doors were first installed.
These problems don't mean wood cabinets were a poor choice. They usually point to a mismatch between the finish, the application conditions, and the way the kitchen is used. Varnish creates a protective film over wood, so it can separate the cabinet material from moisture, cleaning chemicals, abrasion, and everyday contact. The quality of that protection depends on the complete coating system, not on the word “varnish” on a label.
Modern kitchens have also changed visually. Current trend coverage describes a move toward matte and satin wood finishes, and one 2026 Houzz-based report says wood represented 29% of new cabinet finishes while white represented 28% (Captivating Cabinets' 2026 kitchen trend coverage). That shift makes sheen and texture just as important as toughness.
Practical rule: Choose the finish by combining appearance, household habits, and application quality. A beautiful resin in the wrong sheen or a rushed environment can disappoint.
This guide starts with the basic job varnish performs, then compares common systems, explains how Austin-area climate affects the coating, and lays out a factory-style application sequence. You'll also see where varnish fits during refinishing, restaining, painting, and remodeling work in Austin, Buda, West Lake Hills, Georgetown, Hutto, Kyle, Dripping Springs, Driftwood, and Steiner Ranch.
Understanding What Varnish Is and How It Protects Cabinets
Think of varnish as a raincoat for wood. Stain changes the color or emphasizes the grain, while varnish forms a clear surface film over that material. The film gives water and kitchen residue a harder path to the wood fibers, provided the coating has bonded properly and cured completely.
The process is easier to understand in four steps:
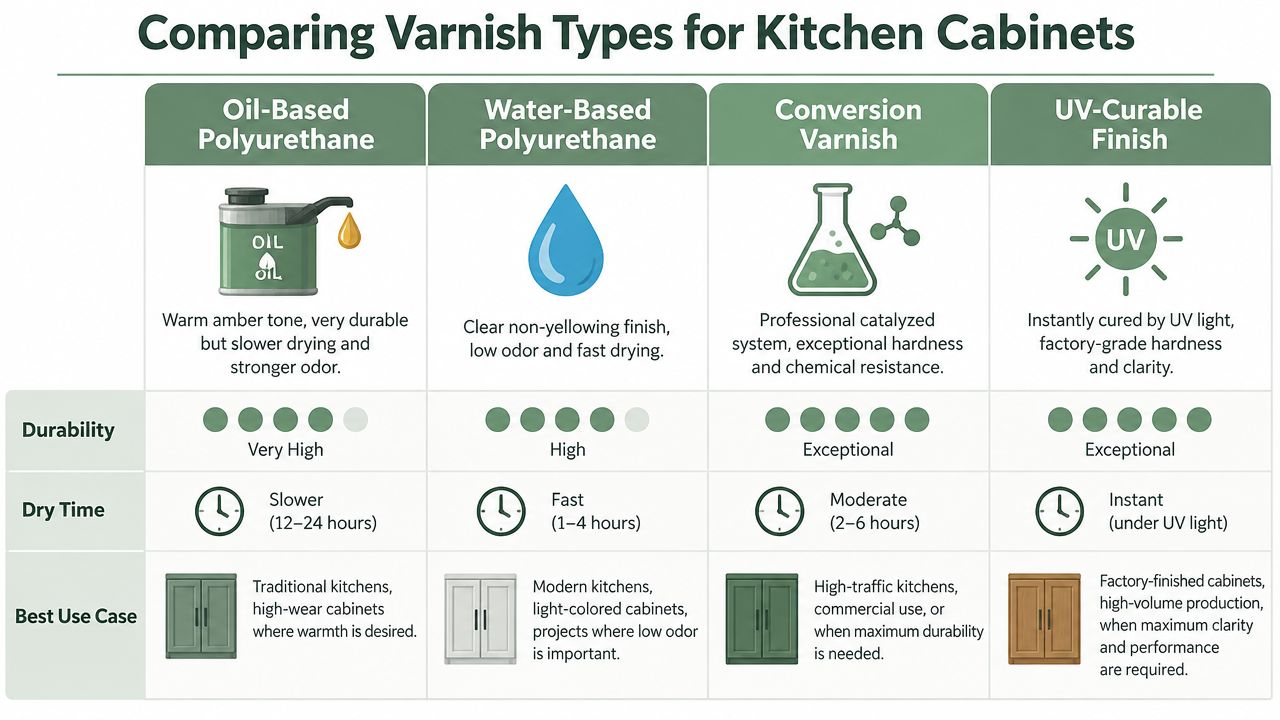
- Preparation creates the foundation. Grease, wax, silicone, dust, and loose old coating can prevent adhesion. Sanding gives the new finish a clean, receptive surface.
- The wet coating spreads across the door. Spraying can produce an even layer with fewer brush marks, especially on Shaker profiles, rails, and recessed panels.
- Solvents or water leave the coating. This is the drying stage. A surface may feel dry while the film underneath remains vulnerable.
- The finish hardens. Some systems rely mainly on evaporation, while catalyzed systems also undergo a chemical reaction. That final cure determines how well the film resists wear.
Film build matters more than a brand name
A thin, continuous film protects better than a patchy coating with heavy ridges, missed edges, or weak adhesion. High-performance guidance for wood finishing notes that three coats protect better than two, because additional film build improves the barrier against moisture and daily wear (Popular Woodworking's finishing guidance).
That doesn't mean a finisher should spray one thick flood coat. Excess material can sag, trap solvent, cure unevenly, or create a cloudy appearance. Controlled coats, appropriate flash time, light sanding where required, and complete curing produce a more dependable surface.
Varnish isn't paint, stain, or oil
Paint hides the wood with an opaque color. Stain penetrates or settles into the surface to alter the appearance while leaving grain visible. Oil may soak into the fibers and create a softer, more natural surface, but it generally doesn't create the same continuous protective film as a cabinet-grade varnish.
Sheen is a separate decision. Matte scatters light and gives wood a quiet, contemporary appearance. Satin reflects more light and often feels easier to maintain visually. Gloss can look crisp, but it also highlights fingerprints, dust, and surface defects.
For a kitchen, ask three basic questions before choosing a product:
- What material is underneath? Solid wood, veneer, and painted surfaces may need different preparation.
- How much wear will the doors receive? A busy cooking zone needs stronger resistance than a lightly used display kitchen.
- How will the finish be applied and cured? The best coating still needs correct conditions and handling.
Comparing Varnish Types for Kitchen Cabinets
The main options differ in how they look, how they dry, how strongly they resist chemicals and heat, and how practical they are outside a professional finishing environment. No single system wins every category.
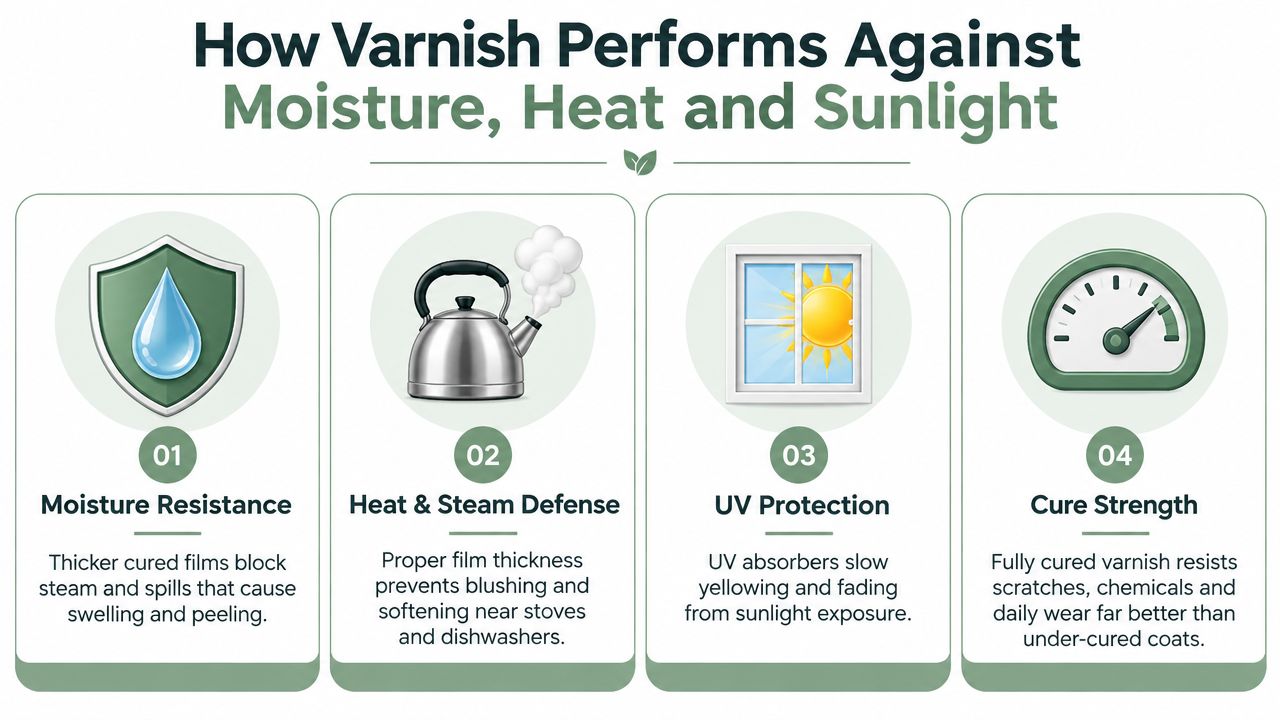
Oil-based polyurethane adds warmth and can deepen the appearance of some woods. It's known for a durable film, but it dries more slowly and has a stronger odor than many water-based products. That makes it suitable for homeowners who value a warmer tone and can tolerate longer project disruption.
Water-based polyurethane keeps a clearer, less amber appearance and usually produces less odor during application. It can suit pale oak, maple, or a kitchen where preserving the original wood color matters. The finisher still needs to control spray technique, surface preparation, and curing. “Water-based” doesn't mean “careless application is acceptable.”
Conversion varnish is a professional catalyzed system. It combines coating material with a catalyst so the finish develops a hard, chemically resistant film. Product lines are regulated in major North American markets at 275 g/L VOC in several cabinet and wood-product applications, while certain category-specific wood-product rules have allowed 550 g/L for conversion varnish under particular operations (Chemcraft's conversion varnish product information). Those limits illustrate why finish selection must account for both performance and compliance.
UV-curable finishes cure under ultraviolet light and are generally associated with factory production. A technical coating source reports 3H-5H pencil hardness, adhesion surviving a 500 g steel-ball drop test, and performance through humidity cycling between 20-90% RH without cracking (Castacabinetry's technical overview). Homeowners typically encounter this technology through factory-finished components rather than an on-site refinishing kit.
Varnish Types Compared for Kitchen Use
| Varnish Type | Durability and Look | Best Kitchen Fit |
|---|---|---|
| Oil-based polyurethane | Warm appearance, durable film, slower drying, stronger odor | Traditional kitchens and darker woods |
| Water-based polyurethane | Clearer appearance, lower odor, faster drying | Light woods and color-sensitive interiors |
| Conversion varnish | Hard professional film with strong chemical resistance | High-use kitchens and factory-style refinishing |
| UV-curable finish | Very hard, clear factory-grade film after UV curing | New cabinet production and controlled manufacturing |
Low-sheen conversion varnish and other clear systems can support the current natural-wood look without forcing homeowners into a glossy surface. Satin may make sense where frequent wiping is expected, while matte can work beautifully when the wood texture is the main design feature. The best choice should be tested on an actual door sample, because the same sheen can look different across oak, walnut, cherry, and maple.
How Varnish Performs Against Moisture Heat and Sunlight
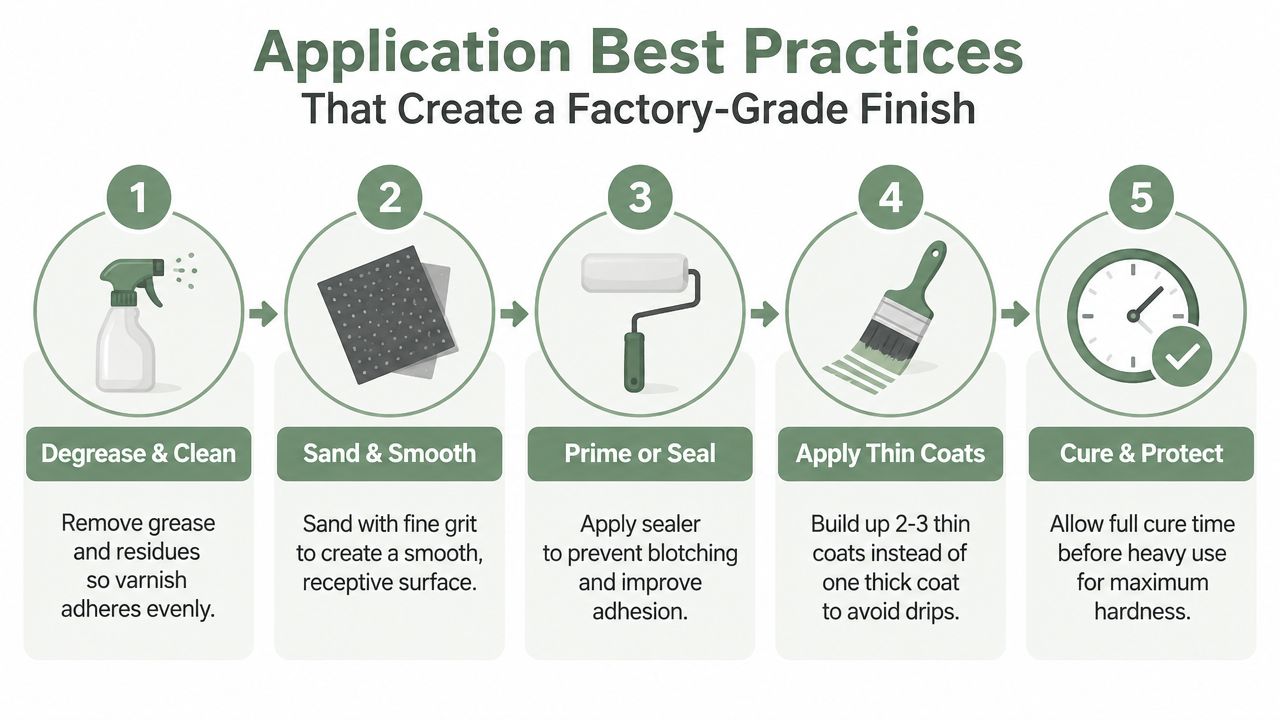
Kitchen moisture usually arrives in small doses. Steam rises from a pot, a dishwasher releases heat and vapor, wet hands touch a drawer front, and a spill reaches an unsealed edge. The problem is repetition. Wood can swell, coatings can soften or blush, and weakly bonded layers can begin to peel when the film doesn't create a reliable barrier.
A thicker, fully cured film gives moisture more resistance than a thin or under-cured coating. High-performance cabinet guidance also identifies oil-based and other high-performance finishes as strong performers for scratch, solvent, and heat resistance (Popular Woodworking's wood-finishing basics). That doesn't eliminate the need to wipe standing water or repair damaged edges. It gives the cabinet a stronger defense during ordinary use.
Austin adds its own demands. One climate source lists average humidity at about 68%, approximately 216 sunny days per year, and an annual UV index around 6 (Austin climate information). A recent September weather reading from another Austin source showed humidity near 81%, demonstrating how quickly local conditions can become challenging for wood finishes (Austin weather conditions). These conditions matter most around windows, sinks, ranges, and doors that receive direct afternoon sun.
What heat and UV do to the film
Heat can make a poorly cured coating feel softer or more vulnerable near a dishwasher or range. UV exposure can alter color and gradually reduce the visual uniformity of natural wood. Clear finishes may include protection against light exposure, but no coating should be treated as a guarantee that wood color will never change.
A technical sheet for a heavy-duty cabinet-suitable varnish reports resistance to heat, water, chemicals, and abrasion, with heavy-wear resistance after about 16 hours of curing and VOC content of 44 g/L, compared with an EU limit of 130 g/L (Polyvine Heavy-Duty Varnish technical data sheet). Treat that as a product-specific example, not a universal promise for every varnish.
The practical lesson is simple: use mild, finish-compatible cleaners, dry wet areas promptly, and avoid assuming that a hard film can compensate for poor ventilation or direct water exposure. For more guidance on local conditions, see protecting cabinet finishes in Texas humidity.
Application Best Practices That Create a Factory Grade Finish
A durable result begins before the spray gun comes out. Cabinet doors collect cooking oils around handles and edges, and even a small amount of silicone-based cleaner can interfere with adhesion. Remove hardware, label every door and drawer, and inspect the old finish before choosing a preparation method.
Prepare the surface completely
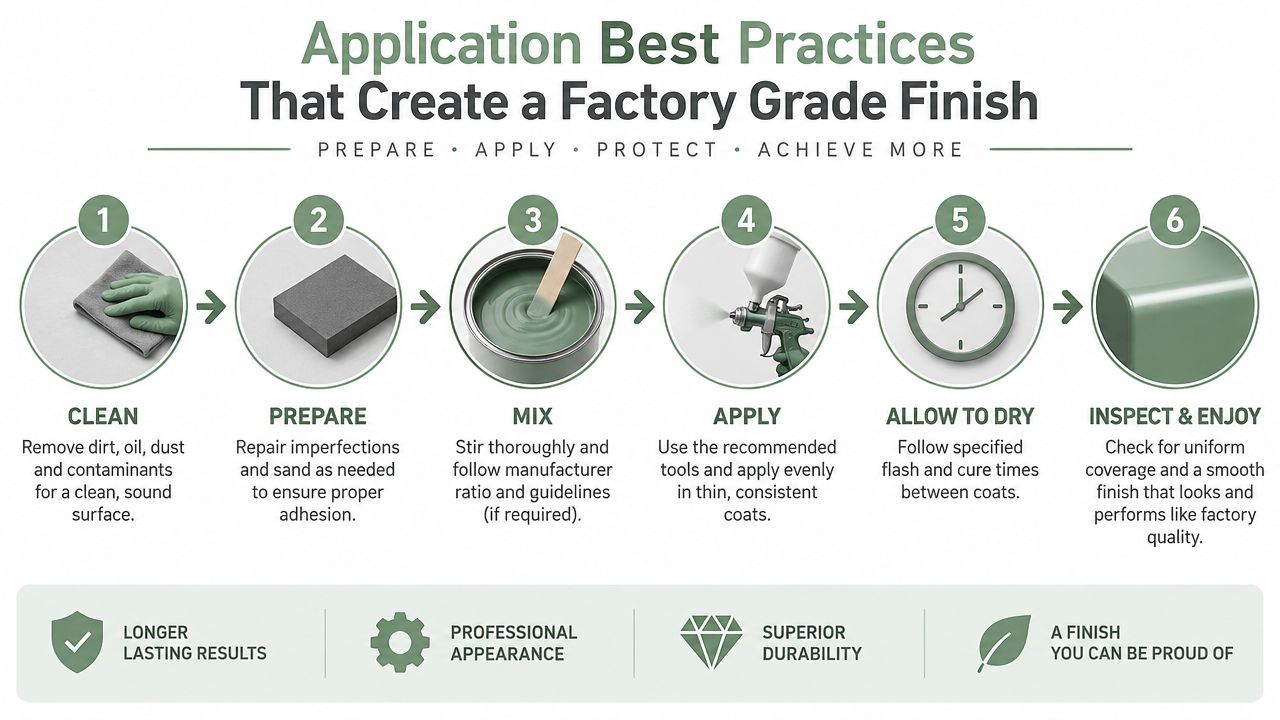
- Degrease and clean. Use a cabinet-safe degreaser, rinse or wipe away residue, and allow the surface to dry. Pay special attention to pulls, corners, and the underside of rails.
- Repair damage. Fill appropriate defects, stabilize loose veneer, and address swollen particleboard or delaminated edges before coating.
- Sand evenly. Sanding should remove gloss and smooth defects without cutting through veneer. Vacuum dust, then wipe with a suitable tack-free cloth.
- Prime or seal when needed. A sealer can reduce blotching on absorbent wood and improve adhesion over a prepared existing finish. The correct product depends on the substrate and coating system.
- Spray controlled coats. Thin, even coats build a continuous film more reliably than one heavy pass.
Catalyzed finishes are sensitive to the environment. One cabinet-finishing source recommends 70-75°F for application, with a minimum of 65°F during application and for 6 hours afterward, plus relative humidity between 40-60%. Humidity above 60% can contribute to blushing, longer cure times, and weaker adhesion (cabinet-finishing conditions).
Shop-floor insight: In Central Texas, a controlled booth isn't a luxury detail. It helps manage dust, temperature, humidity, overspray, and flash time at the same time.
Allow the finish to cure
Dry-to-touch is not the same as ready for heavy kitchen use. Keep doors protected from rubbing, reinstall hardware carefully, and follow the coating manufacturer's cure schedule. Rushing installation can mark the film before it develops its intended hardness.
Environmental compliance also shapes professional practice. EPA wood-furniture finishing rules use benchmarks of 0.8 lb VOC per lb solids for topcoats and 1.9 lb VOC per lb solids for sealers, while spray booth cleaning compounds are limited to 8.0% VOC by weight under the cited rule set (EPA wood-furniture finishing rules). These requirements reinforce why finishers need appropriate equipment, products, ventilation, and disposal procedures.
DIY application can work for a small removable piece when the homeowner has a clean workspace and understands the coating's requirements. A full kitchen is less forgiving. Doors need consistent coverage, edges need protection, and the work must be scheduled around humidity in Georgetown, Hutto, Kyle, and Dripping Springs.
Where Varnish Fits in Cabinet Refinishing and Remodel Workflows
Varnish usually appears as the protective stage of a larger cabinet plan. A stained door may need its old topcoat removed before the wood can be evaluated. A natural oak kitchen may need cleaning, light correction, and a new clear coat. A painted kitchen may use a compatible clear system only when the coating manufacturer and finisher confirm that the layers can bond.
Consider a kitchen in Steiner Ranch with solid wood doors, sound cabinet boxes, and a layout the owners already like. Replacement would change the whole project, but refinishing can preserve the existing structure while updating the color or sheen. The doors can be removed, repaired, sanded, sprayed, cured, and returned while the homeowner coordinates hardware, backsplash, and lighting decisions.
In West Lake Hills, a darker stained kitchen may have good bones but a tired surface near the sink. Restaining is more involved than applying a clear coat because the old finish and color must be assessed first. If the wood can accept a new stain evenly, a new varnish system can restore depth without covering the grain.
Refinish, repaint, or replace
Refinish when the cabinet material is stable, the layout works, and the main problem is surface appearance or protection. This path often avoids demolition and keeps usable boxes out of the landfill.
Repaint when the doors are structurally sound but the color no longer suits the room. A controlled spray process can create a smoother result than brushing in place, especially on detailed profiles. You can review cabinet painting services when a color change, rather than a transparent wood look, is the goal.
Replace when the cabinet boxes are swollen, the layout fails your storage needs, or the doors and substrates can't support reliable preparation. A clear finish can protect sound wood, but it can't restore missing material or correct a poor kitchen layout.
In Buda, Kyle, or Driftwood, the right workflow may include cabinet work alongside countertops, lighting, flooring, and hardware. A finish sample should be viewed in the actual room, because daylight, warm bulbs, and nearby materials change how matte, satin, and gloss appear.
For existing cabinetry, cabinet refinishing services can include cleaning, sanding, repair, and spray application. Ask what happens to the doors, where spraying occurs, how the crew controls dust, and when the finish is ready for normal use.
Choosing the Right Varnish and Next Steps for Your Kitchen
Start with the wood, not the product name. If you want visible grain, decide whether you prefer a clear natural appearance, a warmer oil-based tone, or a catalyzed clear system with a more professional service profile. If the cabinets are painted, discuss whether a clear protective layer is compatible and visually appropriate instead of assuming any varnish can go over any paint.
Then choose the sheen according to how your kitchen lives. Matte supports a quiet, modern wood look and can reduce glare. Satin offers a softer reflection and may feel more forgiving during frequent cleaning. Gloss creates a polished statement but makes dust, fingerprints, and surface defects easier to see.
Before approving the work, ask for:
- A real sample door, not only a phone photo or small color chip.
- The resin and sheen, including whether the system is water-based, oil-based, catalyzed, or UV-cured.
- The preparation plan, especially for grease, old coatings, veneer, and damaged edges.
- The curing conditions, including temperature, humidity, ventilation, and handling time.
- The maintenance guidance, including approved cleaners and repair expectations.
A properly specified varnish system can keep natural wood looking intentional while giving it a stronger defense against steam, wiping, heat, and daily contact. It can also support a lower-sheen design that feels current in homes from Austin and Round Rock to Bee Cave and Lakeway. If your goal is an opaque color instead, cabinet painting may be the more direct route.
Restore My Kitchen ATX evaluates existing cabinet condition, prepares and repairs doors, and applies factory-grade spray finishes suited to the project and Central Texas conditions. Visit Restore My Kitchen ATX to discuss varnish, restaining, cabinet painting, or a broader kitchen update and request a project-specific consultation.