September 16, 2026
Exterior Door Jamb Repair Kit Guide
You notice it when the door starts dragging, the paint at the bottom edge peels, or a screwdriver sinks into the frame instead of biting into solid wood. In Central Texas, that lower corner takes a beating from rain blowing across an exposed entry, humid air trapped near the threshold, and strong sun drying the surface again and again. A small soft spot in an exterior jamb can become a loose strike plate, a crooked door, and a much larger repair if water keeps getting in.
An exterior door jamb repair kit can be the sensible middle ground. It may restore a damaged lower jamb without removing the entire door assembly, but it only works when the surrounding frame, sill, fastener locations, and water management remain sound. The right repair is less about filling a hole and more about removing failed wood, rebuilding the load path, and sealing the finished work against Austin-area weather.
Table of Contents
- Spotting the Early Signs of Jamb Rot
- What Is Inside an Exterior Door Jamb Repair Kit
- Deciding Between a DIY Fix and a Professional
- Executing the Basic Installation Steps
- Navigating Weather Limitations and Durability
- Restoring the Finish After the Repair
Spotting the Early Signs of Jamb Rot
A homeowner in Lakeway or Steiner Ranch may first notice a thin line of peeling paint where the jamb meets the threshold. The lower corner might look merely weathered, yet the wood feels soft when pressed with a pick. Sometimes the door still closes normally, which makes the damage easy to postpone.
That softness matters because the bottom of an exterior jamb sits closest to splashback, failed caulk, wet thresholds, and damp debris. Water can enter through the sill joint or behind the brickmould, then remain in the end grain of the jamb. Paint may hide the problem until the fibers have lost enough strength to affect the screws holding the trim, hinges, or strike assembly.
What the damage is telling you
Look for several signs rather than relying on one:
- Soft or spongy wood: Probe gently with an awl at the lower jamb, especially near the threshold.
- Peeling or blistered paint: This can indicate moisture beneath the coating, not just an old finish.
- Loose trim or strike hardware: Failed wood may no longer hold screws securely.
- Darkened end grain: Discoloration near the sill often points to repeated wetting.
- A widening joint: Movement between the jamb and threshold can let more water enter.
A repair kit makes sense when rot is concentrated in the lower section and the remaining jamb is sound. Partial-frame replacement pieces are specifically sold to replace rotted jamb bottoms on exterior door frames, rather than requiring full-door replacement, as shown by this PVC jamb moulding repair kit example.
The practical advantage is targeted restoration. You cut away the compromised section, fit a new lower member, and preserve the usable frame above it. That approach reflects established preservation practice, where damaged wood may be consolidated, partially replaced, or patched while retaining as much original material as possible, as described in New York historic-door repair specifications.
What Is Inside an Exterior Door Jamb Repair Kit
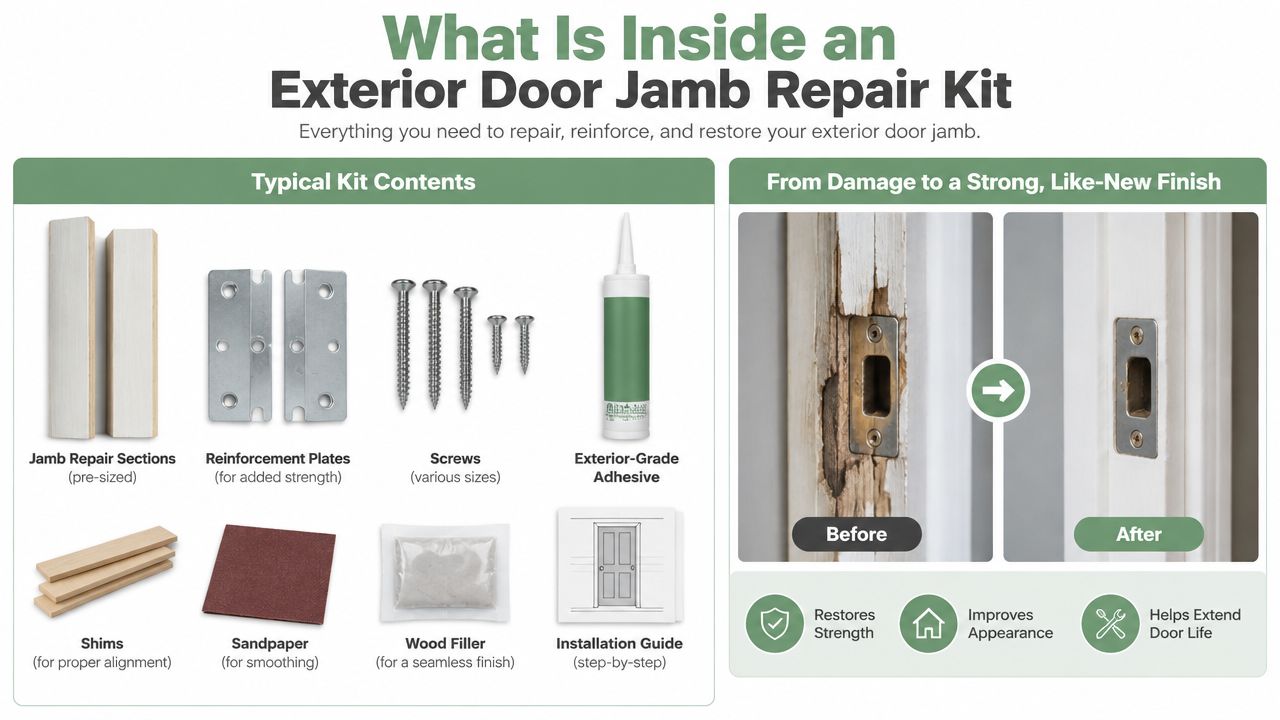
Repair kits generally fall into two groups, partial replacement systems and epoxy-based restoration systems. They solve the same visible problem in different ways. One removes the damaged portion and inserts a new jamb section. The other stabilizes the existing wood and rebuilds missing material in place.
A PVC replacement kit typically includes a moulded jamb piece sized to match a common exterior frame profile, along with fastening or bonding materials selected by the manufacturer. The PVC section replaces the vulnerable lower portion and can work well when the surrounding frame remains straight and the profile matches the existing jamb. It won't absorb water like decayed wood, but the joints, caulk lines, paint, and threshold still need careful attention.
PVC replacement versus epoxy rebuilding
| System | What it does well | Where it can disappoint |
|---|---|---|
| PVC jamb insert | Replaces badly damaged lower material with a moisture-resistant shaped piece | Requires accurate cutting and a compatible profile |
| Epoxy consolidant and filler | Preserves more original wood and rebuilds irregular missing areas | Needs controlled mixing, prompt application, sanding, and exterior sealing |
| Security reinforcement plate | Reinforces a localized weak area around hardware | Doesn't correct widespread rot or water entry |
An epoxy system depends on two-stage chemistry. A low-viscosity consolidant or primer first penetrates porous, softened fibers. After that substrate is stabilized, a thicker two-part filler rebuilds the missing profile. The repair should be left slightly proud so it can be shaped after curing, and the manufacturer's mixing ratio and working time must be followed closely. The published epoxy jamb repair guidance also emphasizes exterior-grade primer and paint because an unprotected patch remains vulnerable to ultraviolet exposure and moisture cycling.
For a tight, straight lower cut, PVC is often easier to understand. For historic millwork, an unusual profile, or limited localized loss, epoxy can preserve more of the original jamb. Neither material fixes a leaking sill, failed flashing, or wet framing behind the trim. The kit addresses the failed member, not every reason that member became wet.
The wider market supports this repair-first approach. IBISWorld estimates the U.S. Door Installation & Repair Services industry at $7.7 billion in 2026, with 6,432 businesses operating in the sector, while industry revenue grew at a 0.6% CAGR from 2019 to 2024 and the business count grew at a 1.9% CAGR over that period, according to the IBISWorld industry data. Jamb repair is one recurring part of that broader maintenance market.
Deciding Between a DIY Fix and a Professional
A kit is appropriate when the damage is limited, visible, and accessible. A professional is the safer choice when the repair affects the door's geometry, security hardware, or hidden framing. The dividing line isn't whether you can operate an oscillating tool. It's whether you can restore the jamb without compromising alignment, fastening strength, and water management.
A practical decision matrix
| Condition | DIY repair may fit | Professional work is more appropriate |
|---|---|---|
| Rot location | Damage is confined to the lower jamb | Rot continues behind brickmould or into wall framing |
| Door operation | Door closes squarely before repair | Door binds, sags, or has uneven reveals |
| Strike area | Strike screws still hold in solid material | Strike plate sits in soft wood or has pulled loose |
| Frame shape | Existing jamb is straight and stable | Jamb is bowed, twisted, or separated from framing |
| Finish expectations | A painted touch-up is acceptable | Stained wood or historic millwork must blend seamlessly |
| Water source | Threshold and caulk can be corrected | Sill, flashing, siding, or drainage defects remain unresolved |
The strike-side jamb deserves special caution. It carries hardware that helps keep the door secure, so replacing wood beside a loose strike plate with a cosmetic epoxy skim won't restore the required holding strength. If the hinge-side jamb has shifted, the repair may also need shimming and frame correction rather than a simple lower insert.
Historic homes and custom neighborhoods around West Lake Hills, Bee Cave, and Driftwood often have profiles that don't match an off-the-shelf moulding. Official historic-door guidance describes repairs such as stripping paint, squaring frames, consolidating damaged wood, replacing partial members, and injecting adhesive into traditional joints. That preservation mindset is useful here: retain sound original material, but don't preserve failed fibers to avoid a clean cut.
Decision rule: If the door still operates correctly and the damage ends below sound, load-bearing material, a kit may be reasonable. If the frame has moved or the hardware has lost its grip, call for a structural assessment.
Professional refinishing becomes relevant after the carpentry, especially when the existing door has a stained finish or multiple layers of failing coating. A company such as Restore My Kitchen ATX's deck refinishing service is an example of the broader preparation-and-sealing discipline used on exposed wood, though a jamb repair still needs door-specific evaluation.
The contractor should also inspect the threshold joint, brickmould, adjacent siding, and interior casing. A replacement piece installed into a persistently wet opening is not a durable repair. It's a new component placed in the same failure pattern.
Executing the Basic Installation Steps
A partial jamb replacement succeeds or fails at the cut line. Measure from the actual bottom of the existing jamb, not from a decorative trim edge or an uneven threshold. The published repair sequence used for one jamb system specifies a cut at 6¾ inches from the bottom and a notch depth of 1¼ inches, dimensions that must be checked against the specific kit and existing profile before cutting. The manufacturer's jamb repair instructions provide another sequence using those same reference dimensions.
Prepare the opening
Remove the door stop or brickmould only as needed to expose the damaged section. Protect the door and threshold, remove loose paint, and probe the jamb until you find firm wood. Don't cut through a surface that still contains punky fibers. The insert needs sound material to support fasteners and maintain alignment.
Mark a horizontal line 6-3/4 inches up from the bottom of the jamb. On the oscillating tool, set the blade depth to 1-1/4 inches where the kit calls for a notch, and keep the tool square to the jamb face. The purpose is controlled removal, not speed. A wandering blade can damage the framing behind the jamb or create a joint that won't sit flush.

Cut back and fit the replacement
- Remove the lower section. Cut completely through the jamb at the marked height when the kit requires it. Use an oscillating tool for control in a tight opening, or a handsaw where access allows.
- Clear the rotten material. Take out every decayed portion until the remaining edge is firm. A chisel helps clean corners, but avoid gouging sound framing.
- Make the notch. Follow the kit's specified 1¼-inch notch depth so the replacement piece can overlap and align with the original load path.
- Dry-fit the insert. Check the jamb profile, face alignment, threshold relationship, and door clearance before applying adhesive or driving fasteners.
- Secure the new piece. Use the supplied fasteners or the approved bonding method. Keep the insert flush with the existing jamb face, and don't pull it out of alignment by over-tightening.
- Rebuild the finish profile. Fill small gaps with compatible exterior material, sand only after the repair has set, and reinstall trim with a continuous, properly tooled seal.
The bottom joint deserves extra scrutiny. Any opening between the insert, threshold, and jamb gives water a path into end grain. Custom fitting matters here. Threshold guidance recommends making the replacement threshold 1 to 2 inches longer than the doorway so it can be trimmed and notched around both jambs, as explained in this threshold replacement guide.
Before closing up the trim, test the door repeatedly. Confirm the reveal remains even, the latch engages without force, and the strike screws enter solid material. A clean-looking joint that leaves the door rubbing isn't finished work.
Navigating Weather Limitations and Durability
Central Texas exposes exterior repairs to a demanding cycle. A jamb may heat in direct sun, absorb moisture during a storm, and dry rapidly afterward. Homes in Georgetown and Hutto can also have entry conditions where intense UV reaches the repair for much of the day, while covered porches may hold humid air against the lower frame.
The assumption that structural repair equals finished repair causes many callbacks. Epoxy and bare PVC still need a compatible exterior primer and paint system, and the surrounding wood needs sound coatings as well. Epoxy guidance warns that ultraviolet exposure and moisture cycling can degrade an unsealed patch, so leaving the repair exposed after sanding is not a reasonable long-term finish.
Seal the water path, not just the patch
Inspect the sill-to-jamb joint, the bottom of the brickmould, and any seam where trim meets masonry or siding. Use a sealant compatible with the adjacent materials and tool it so water sheds instead of collecting in a recess. Don't caulk over wet wood, open rot, or a joint that is moving.
A useful Central Texas maintenance habit is to inspect the lower corners after major downpours and before the hottest part of summer. Look for cracked caulk, lifted paint, exposed end grain, and water staining. The Texas humidity finish guidance is relevant to the same broader principle, coatings perform only when the substrate is prepared and the finish system suits the exposure.
There isn't a reliable universal lifespan for every repair kit. Climate, roof runoff, porch coverage, paint quality, threshold condition, and workmanship all change the result. A PVC insert may avoid decay in the replacement piece, but the surrounding joints can still fail. An epoxy repair can preserve valuable wood, but it remains dependent on complete sealing and stable substrate.
Weather test: After the next hard rain, inspect the repair from the inside and outside. If moisture keeps reaching the joint, correct that source before adding another coat of paint.
Full replacement becomes more economical when rot extends into framing, the door slab is also failing, the frame is badly out of square, or repeated repairs would leave a patchwork appearance. In those situations, a kit may delay the necessary rebuild without solving the opening's underlying movement or drainage problem.
Restoring the Finish After the Repair
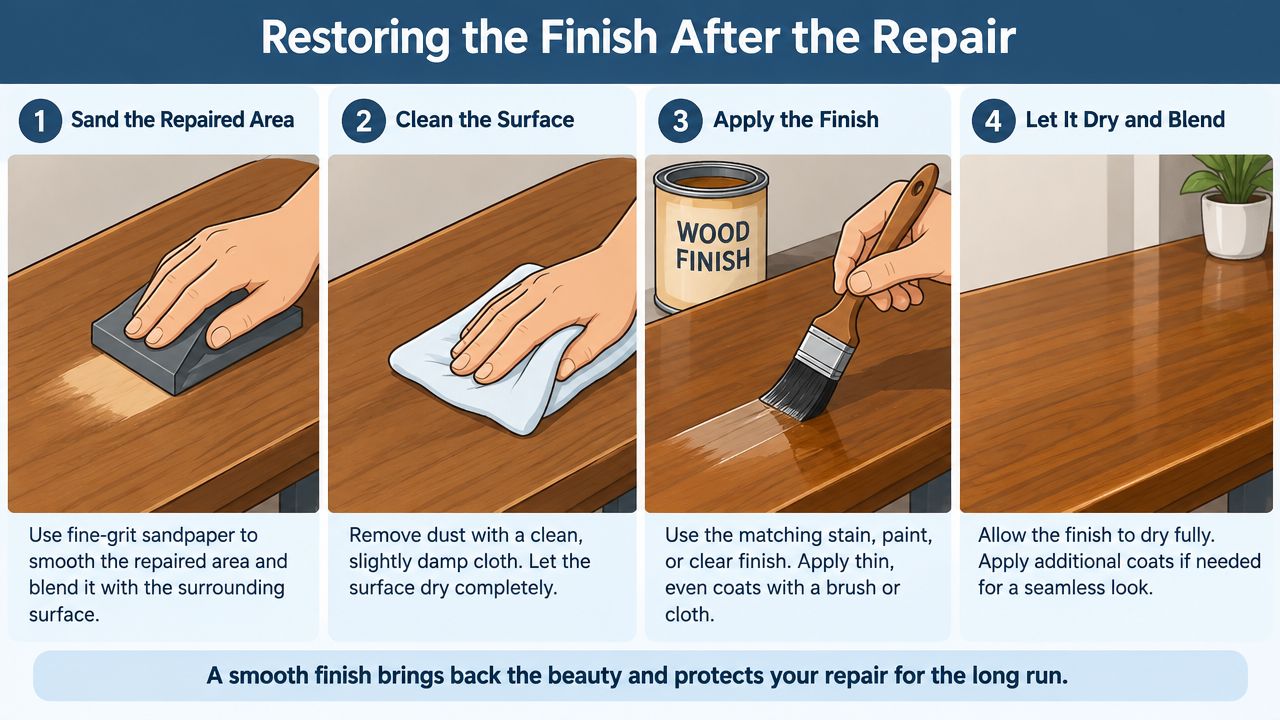
The carpentry may be sound while the entry still looks unfinished. A new PVC section or bright epoxy patch can stand out against a sun-faded jamb, and a small color mismatch becomes obvious at the front door. Structural restoration and finish restoration should be treated as separate jobs that meet at the primer and topcoat.
For a painted opening, sand the cured repair and feather the surrounding coating so the transition doesn't show through. Prime exposed wood, cured epoxy, and compatible PVC according to the coating manufacturer's requirements, then apply the exterior finish without trapping dirt or leaving a heavy ridge at the joint. Stained doors require more restraint because a patch often absorbs color differently from aged wood.
Where professional refinishing helps
A professional refinishing service can strip failing coatings, sand the door and frame consistently, repair surface defects, and apply a coordinated stain or spray finish. That process is especially useful when the door has raised panels, detailed moulding, or a finish that needs to match rather than cover.
Homeowners in Cedar Park and Dripping Springs may want the jamb repair handled first, then have the complete entry evaluated through front door refinishing services. A coordinated protective topcoat helps the repaired area look intentional and keeps the door, jamb, and trim working as one finish system.
If you live in Austin, Round Rock, Leander, Buda, Kyle, Pflugerville, Georgetown, Hutto, Bee Cave, Lakeway, West Lake Hills, or nearby communities, the right scope depends on the damage and the finish you expect. A kit can solve a concentrated jamb failure, while professional refinishing can restore the complete curb appeal after the woodwork is stable.
Restore My Kitchen ATX offers front door refinishing and exterior wood finishing for Austin-area homes, including preparation and protective coating work after a jamb repair. If your entry needs more than a patch, visit Restore My Kitchen ATX to discuss the door, frame condition, and finish you want restored.